Image management with Harbor in Tanzu
Image management for our containers is a very important task in the development and deployment of our applications. Normally when we start working with containers, we use the public registry of Docker known as Docker Hub, but as the process progresses in our organization we seek to have more control over the images, to ensure that the image does not present vulnerabilities, to control access to them and other aspects that with Harbor we can cover.
Harbor is an open source solution developed by VMware and donated to the CNCF, so if you are using Tanzu you can rest assured that Harbor has support directly from VMware in case you need it.
Some of the benefits and features of Harbor are:
- Vulnerability scanning: With Harbor we can scan or analyze our images for vulnerabilities, for this Harbor uses the open source project called Trivy.
- User management: In Harbor we manage our images through projects, over which we can give or deny access to our users or developers if necessary. Additionally, we can integrate it with our Active Directory or use local users.
- Set quotas: To have a better control of our resources, in Harbor we can set storage quotas for our projects, with this we control that for example a project used to store test images does not consume the space of a production project.
- Signing images: Signing our images and verifying signatures is a way to guarantee and verify the integrity of the images we use in our deployments, Harbor integrates with Notary for this purpose.
To start using images stored in our Harbor implementation in our deployments we must:
- Create a project within Harbor:
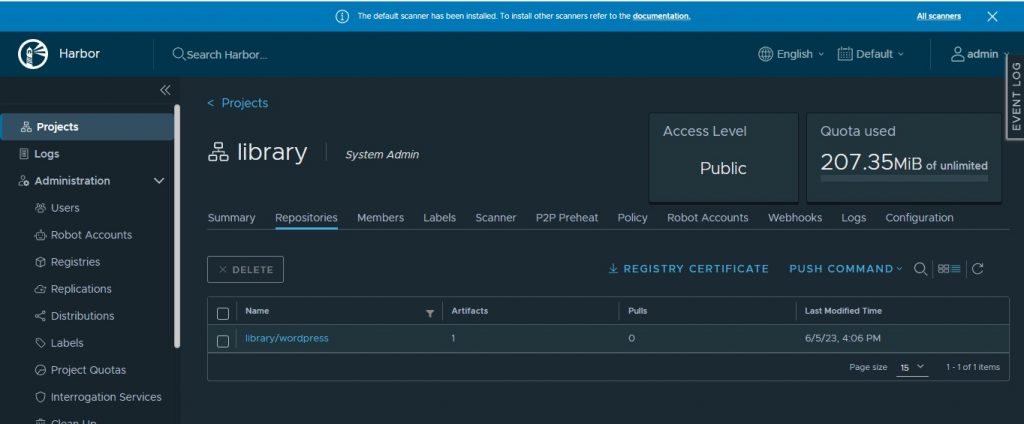
2. In our Bootstrap machine we must import the Harbor certificate. In this case we are using self signed certificates, to get it we have two options:
- Execute the following command:
https://nombe_de_dominio_de_harbor/api/v2.0/systeminfo/getcert
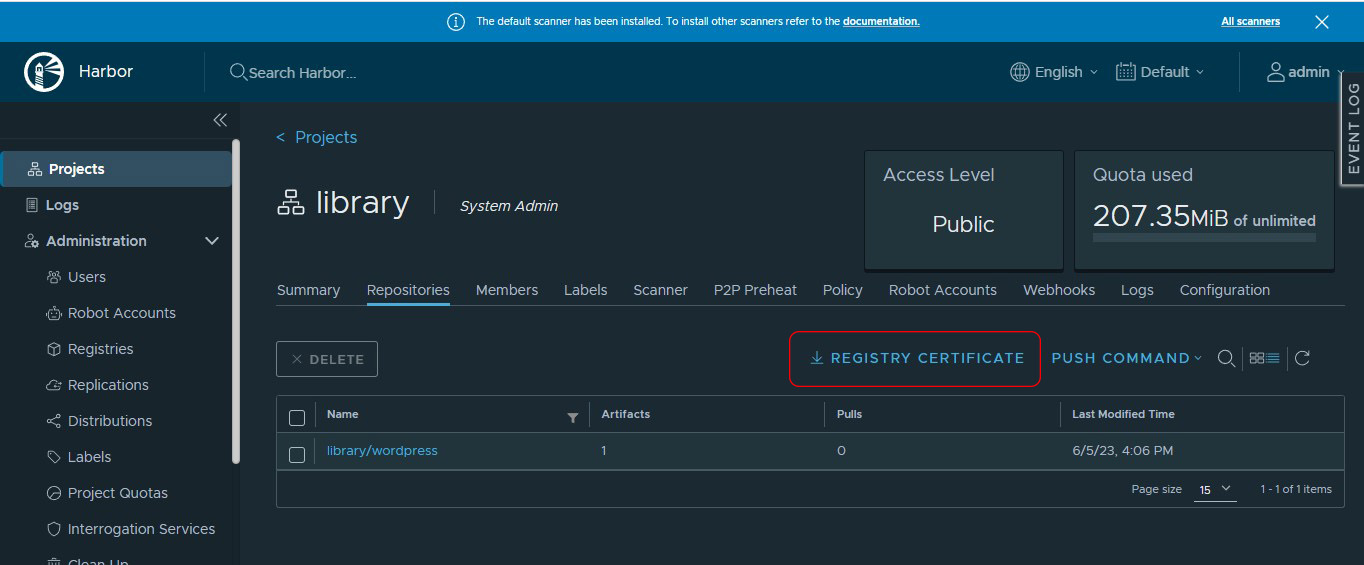
- From the Harbor graphical interface by clicking on the Registry Certificate option:
3. Once we have the Harbor certificate we must save it in the following path:
/etc/docker/certs.d/harbor_domain_name/harbor_certificate.crt.
If the path does not exist previously, we must create it:
mkdir /etc/docker/certs.d/harbor_domain_name/.
4. Now we can log into Harbor from our bootstrap machine, we must use the credentials with which we log into the harbor GUI, for this we use the following command:
docker login harbor_domain_name -u admin
5. Now we can download the image to our machine:
sudo docker pull image_name
6. We tag the downloaded image, for example wordpress:1.0
docker tag wordpress:1.0 harbor_domain_name/project_name/wordpress:1.0
7. We insert the image in our Harbor registry, for this we use the following command:
docker push harbor_domain_name /harbor/project_name/wordpress:1.0
Once we have our images in the Harbor registry we can use them in our deployments, for this we just need to place the path of the image in the yaml manifest of our deployment.
Thanks for reading.
How is a moodle implemented?
A moodle is implemented when a client requests an educational platform that allows teachers and students to access resources in an easier way, and that has a forum, chats, assignments, quiz, etc.
Web platforms or content management systems allow for daily editing, development and administration of content, as well as daily updates, writing articles, creating new pages and inserting any type of multimedia.
Additionally, it has support for updates and development of plugins, since moodle has a free software community, which provides security for any inconvenience reported in order to solve it.
Next we will give details of how to perform this implementation successfully and also indicate what are the prerequisites to carry out this activity:
To perform this activity you must have the following prerequisites:
- Linux Debian 11 0 operating system installed
- Have the SSH service installed and configured for remote access from any computer.

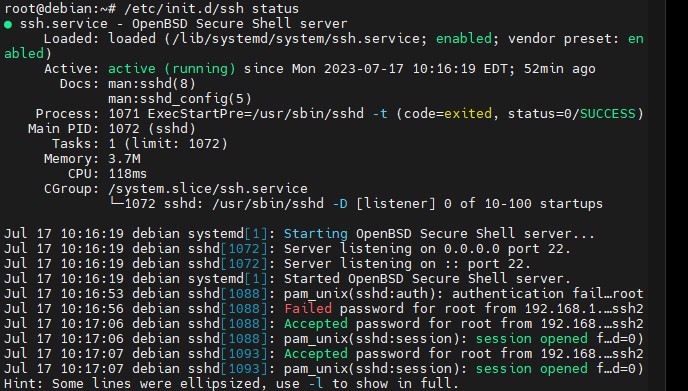
Step 1: Accessing and updating the system
Note: It is recommended to have the root user or a user that allows installing dependencies and services.
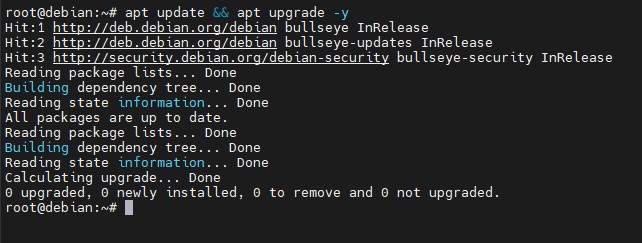
Previously we identify that we have a Debian version 11 operating system and proceed to install the updates and perform an upgrade of packages and services through the command:
apt update && apt upgrade -y
Step 2: install and configure apache
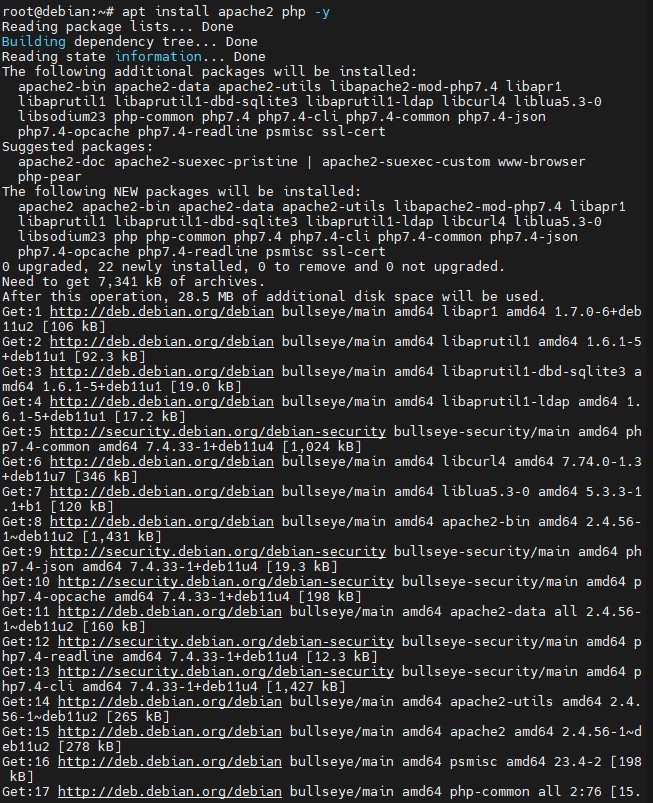
For any type of content management system a web service is required. For taxation apache will be used and is installed as follows:
apt install apache2 php -y
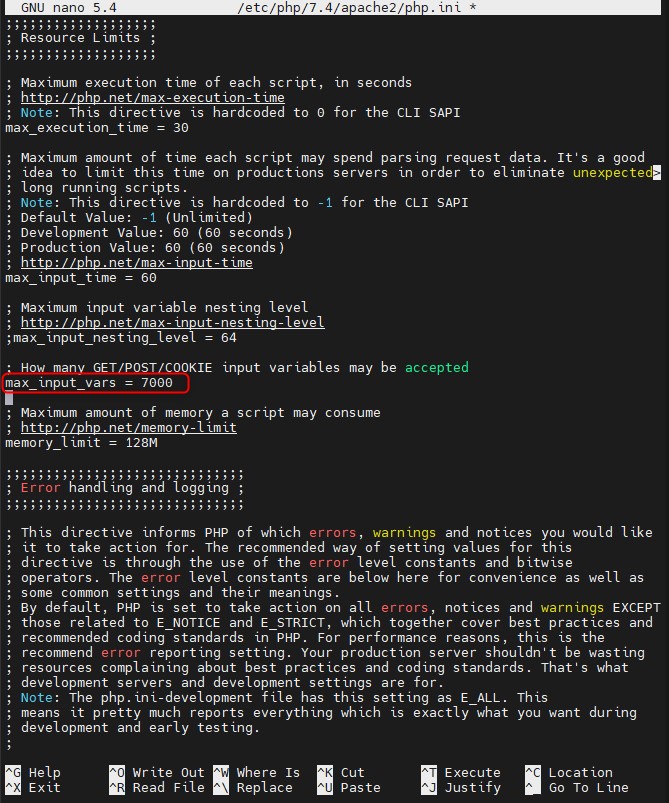
To improve the maximum allowed connections we recommend the max_input_vars = 7000 parameter, which is found in the file:
/etc/php/7.4/apache2/php.ini to 7000.
Using the following command nano /etc/php/7.4/apache2/php.
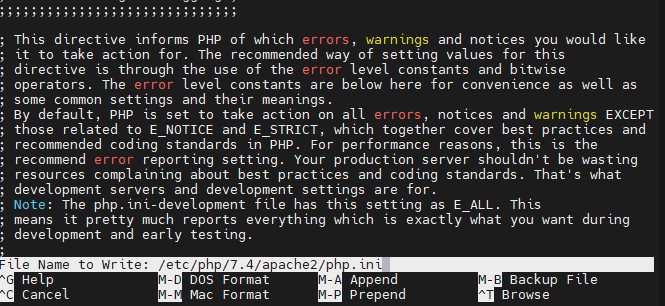
Using the command control + x we save the changes made.
Then restart the service using the following command: systemctl restart apache2

Step 3: install Maríadb
Moodle requires a database for users and information, so it is advisable to install Maríadb, since it is in the official Debian repositories and is installed with the following command:
apt install mariadb-server -y
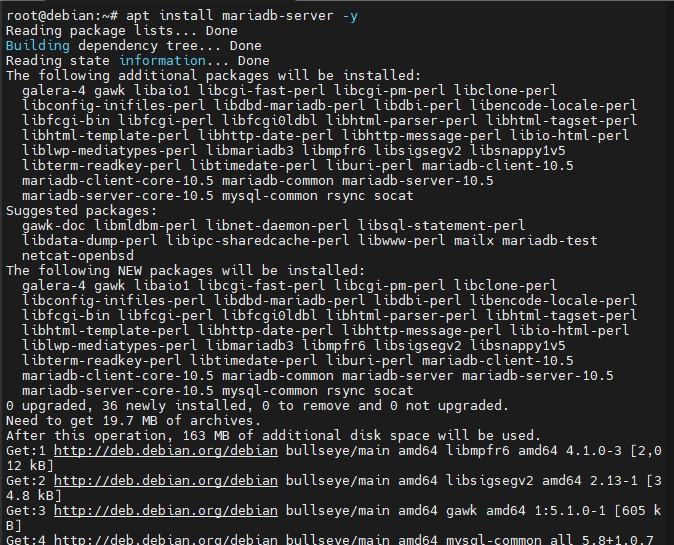
After having this database installed, we proceed to secure it and it will be done with the following commands:
mysql_secure_installation
It is recommended to assign a strong password.
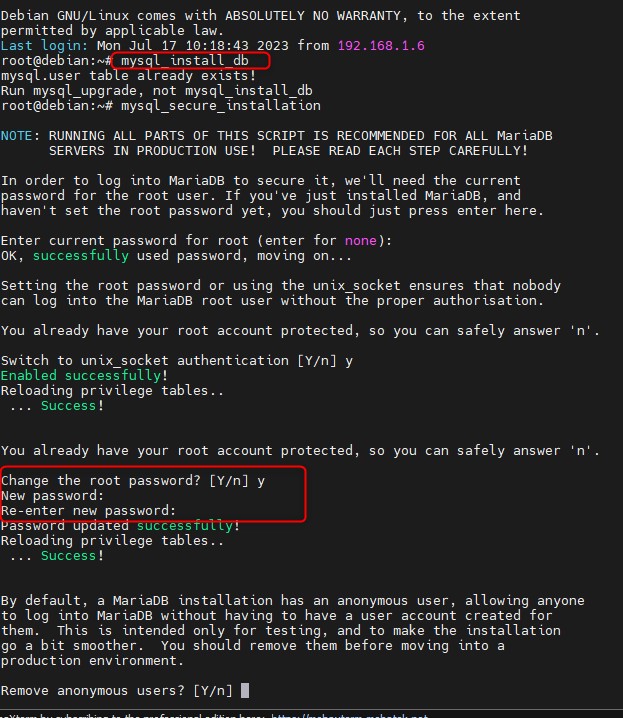
Remove the Anonymous user.

Remove the test database.

Apply changes on the configuration.

Then, proceed to create a database where moodle and users will be stored with the following commands:
- mysql -u root -p login with the previously created password.

2. Create moodle database using: CREATE DATABASE moodle_db DEFAULT CHARACTER SET utf8mb4 COLLATE utf8mb4_unicode_ci;;
3. Create Moodle user in the mysql database using CREATE USER moodle_user@’localhost’ IDENTIFIED BY ‘m0d1fyth15’;
4. Assign privileges to the user and database using GRANT ALL on moodle_db.* to moodle_user@localhost;
5. Apply changes using FLUSH PRIVILEGES;
6. Exit using \q
Step 4: Install PHP
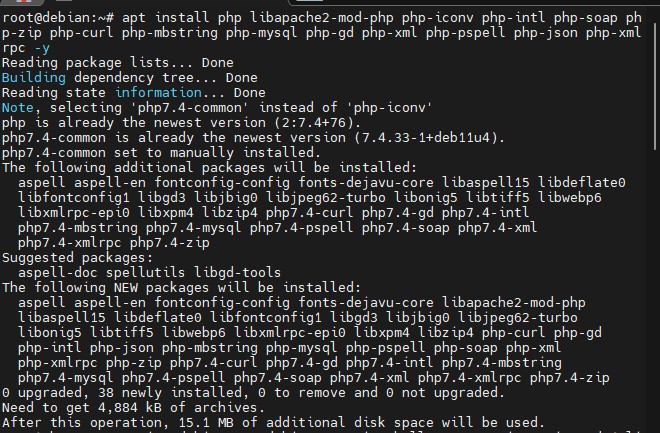
Any web content requires the use of php, for this all php extensions are installed through the command:
apt install php libapache2-mod-php php-iconv php-intl php-soap php-zip php-curl php-mbstring php-mysql php-gd php-xml php-pspell php-json php-xmlrpc -y
Step 5: Download Moodle
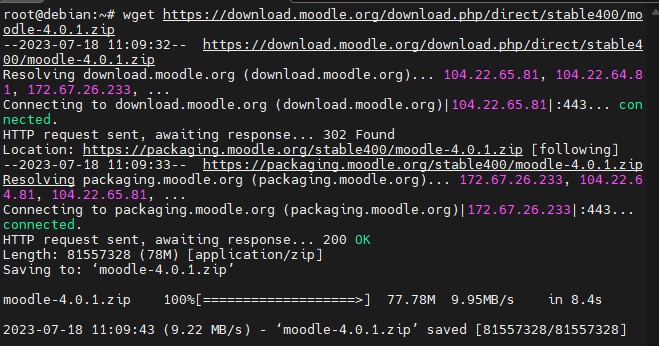
1. Now you will download the stable version of moodle from its official site https://download.moodle.org/releases/latest/ using the command wget https://download.moodle.org/download.php/direct/stable400/moodle-4.0.1.zip
2. Extract the file using a zip file that must be previously installed (apt install unzip -y) and send it to the folder located in /var/www/html/ using the following command:
unzip moodle-4.0.1.zip -d /var/www/html/

3. Create the directory with: mkdir /var/www/html/moodledata
4. Assign permissions to the directories and rename in apache using the following commands:
chown -R www-data:www-data /var/www/
chown -R www-data:www-data /var/www/html/moodle/
chmod -R 755 /var/www/html/moodle/
chown -R www-data:www-data /var/www/html/moodledata/

5. Finally, we proceed to install moodle in the web way
Accessing http://192.168.1.29/moodle/install.php
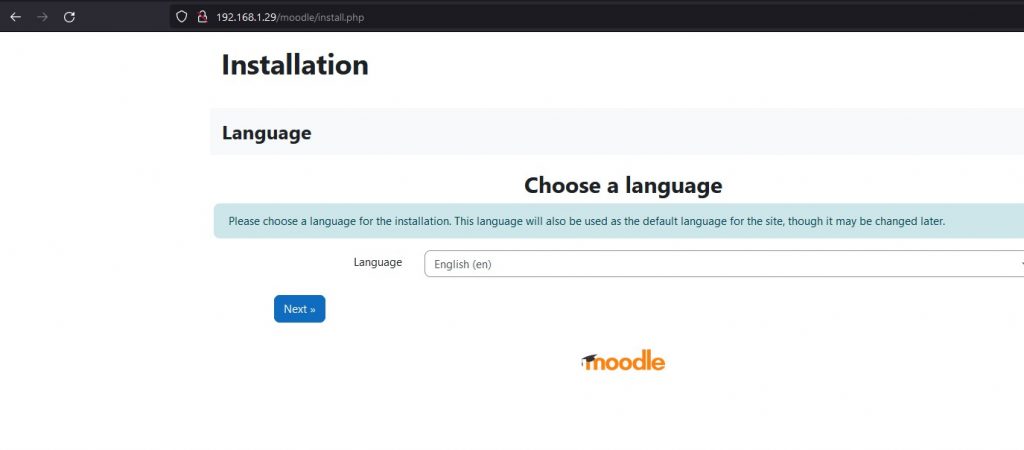
Click on next.
Configure the url providing the indicated data.
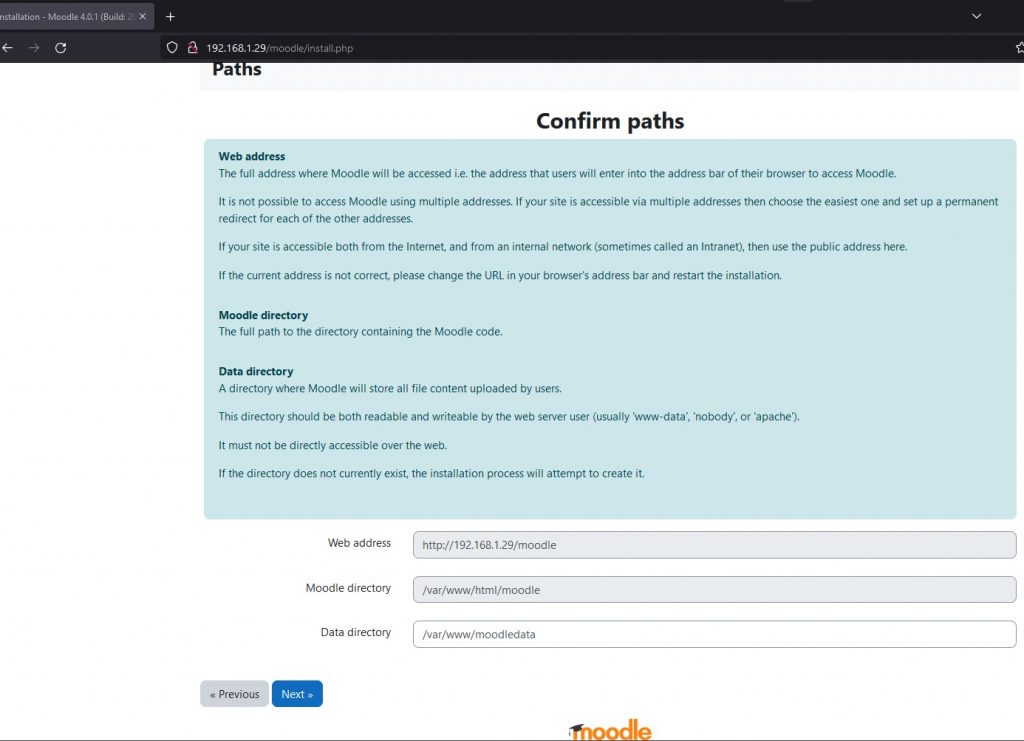
Configure the database using MariaDB.
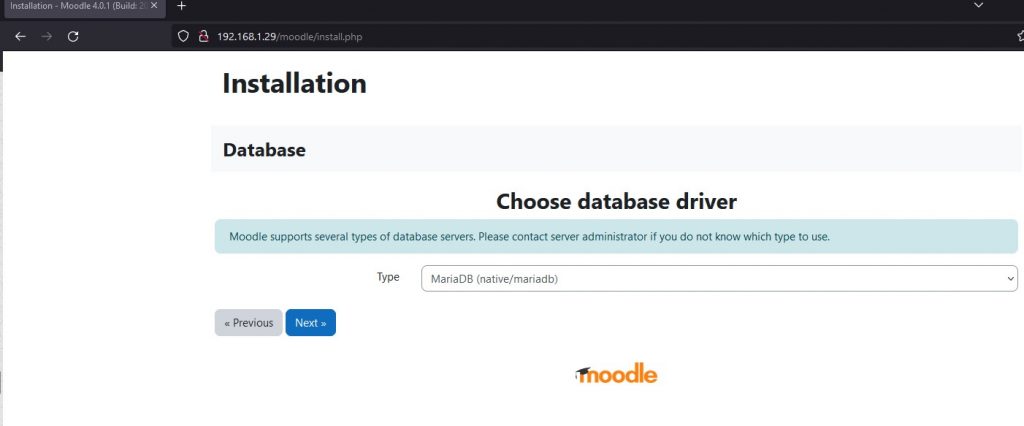
Provide the information of the configured database and click on next.
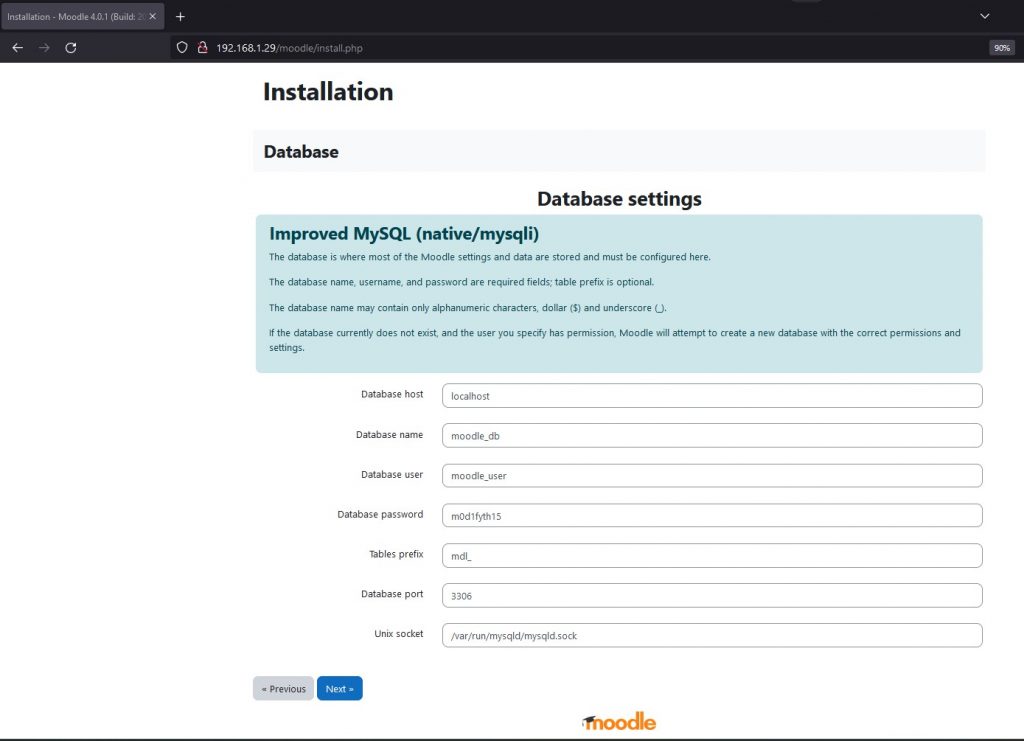
And in the path configure the parameter $CFG->dbtype y agregar ‘mariadb’;//’mysqli’;
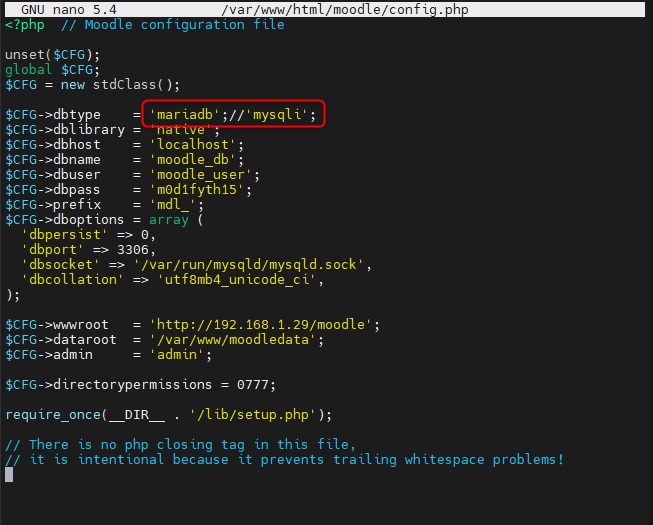
Finally, restart the apache service
/etc/init.d/apache2 restart
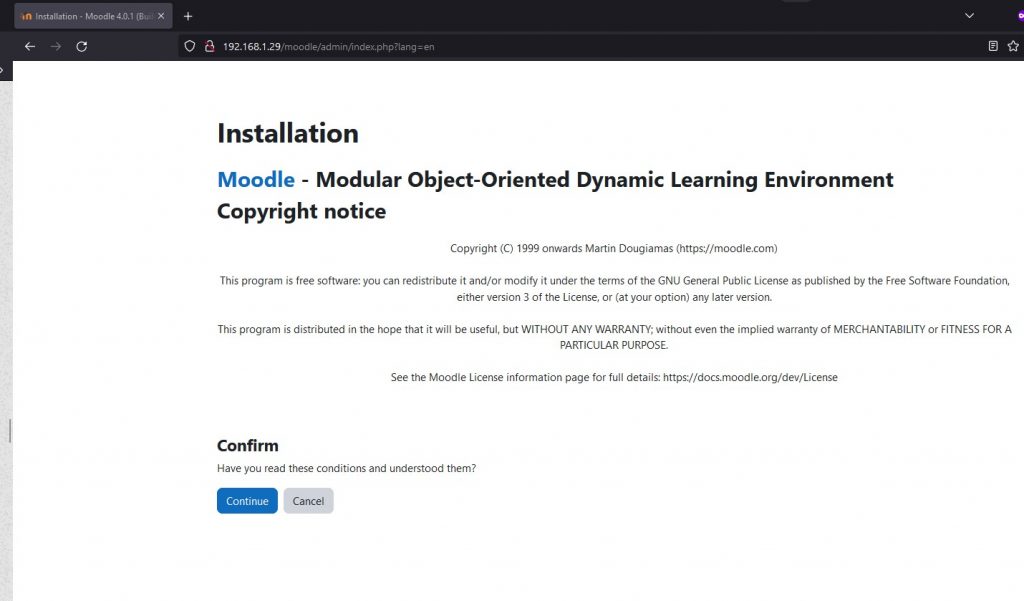
Accept the conditions and click next.
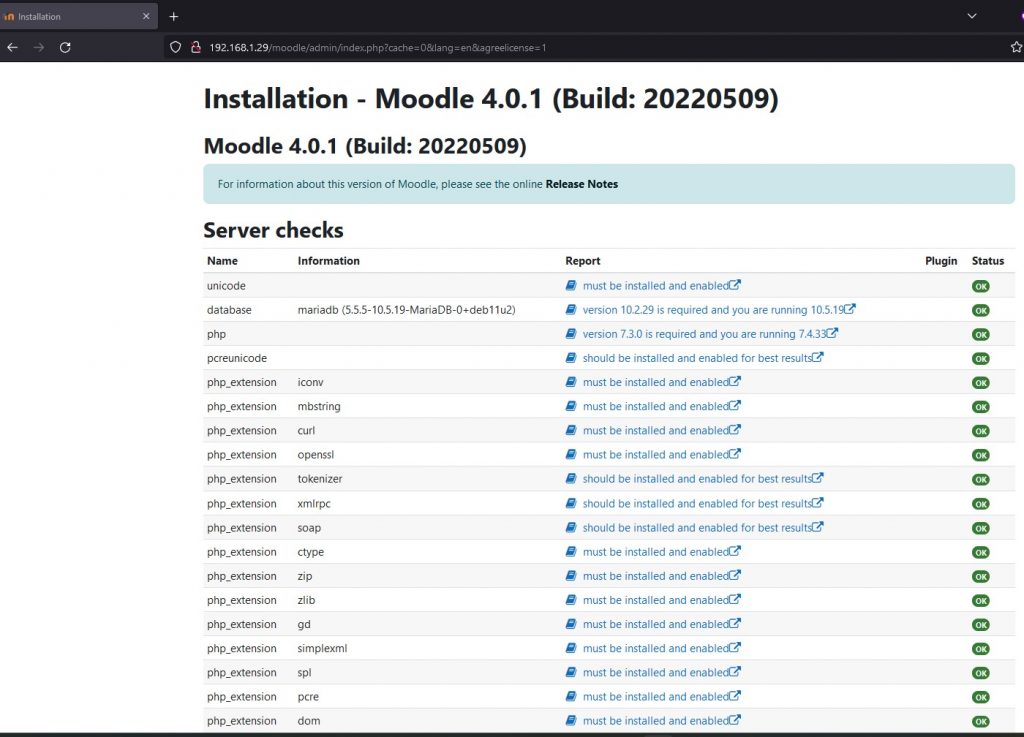
Verify that it fulfills the requested requirements and click continue.
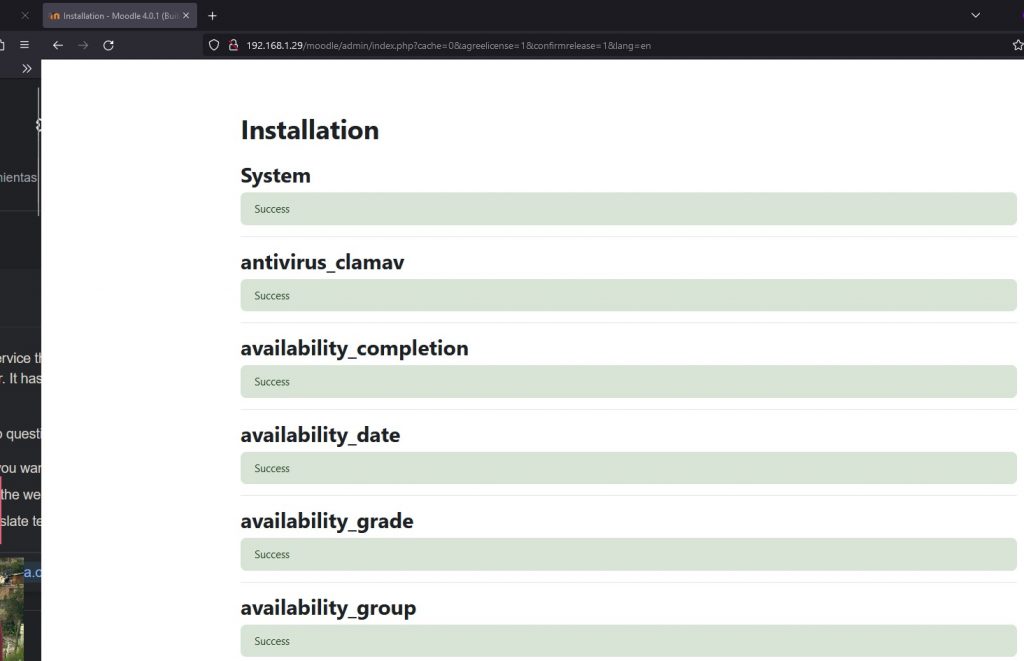
Fill in the profile data and click on update profile.
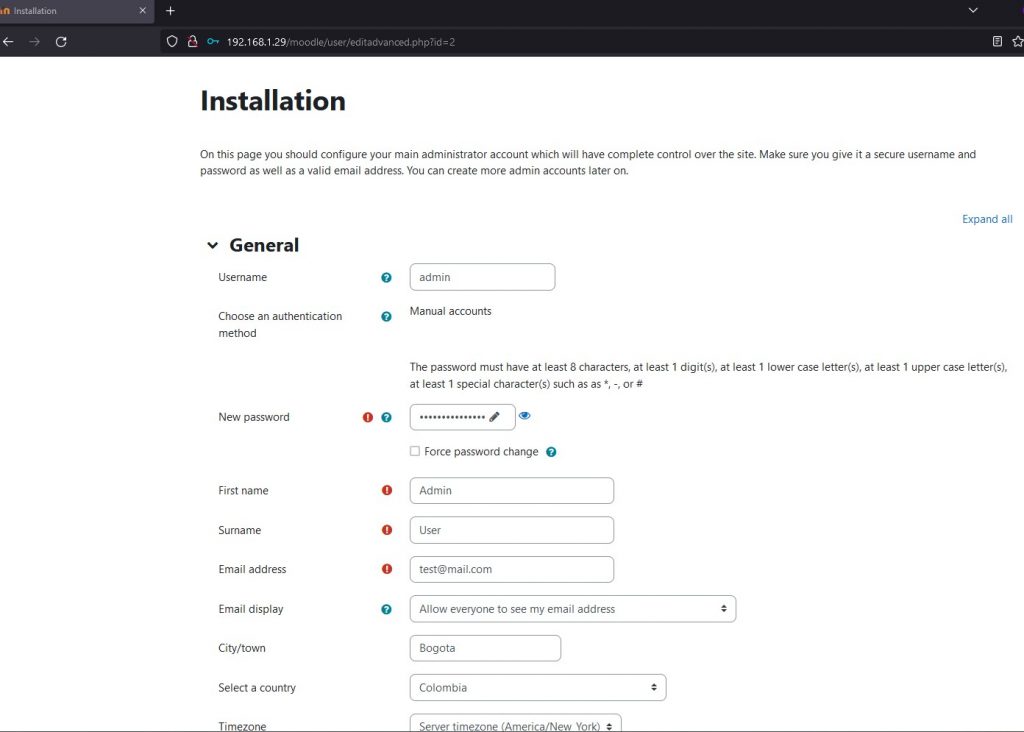
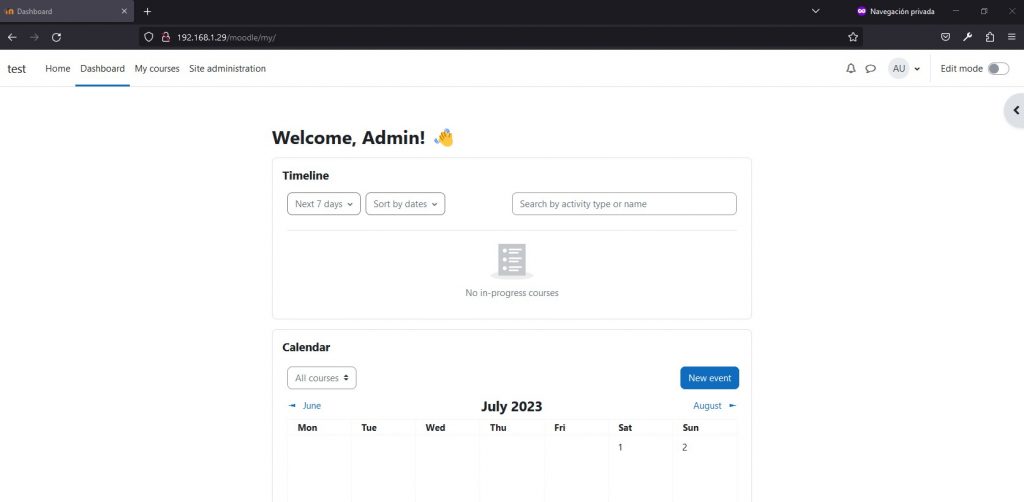
After making these settings, finish the installation and access the dashboard as administrator.
Thank you for reading.
Done by: Oscar Gonzalez
Edited by: Diana Oviedo
References
CHECK VSAN HEALTH
VMware vSAN administration is done through the vCenter Server, but there are some situations where it is not possible to access the vCenter Server GUI for different reasons:
- vCenter offline: vCenter server is offline due to maintenance or internal failure.
- Network device migrations: The data center is migrating network devices, which means that connectivity with vCenter is lost.
Many customers currently run critical solutions on VMware vSAN and therefore cannot afford to be unaware of the health of the platform. In that order, it is a good new that VMware vSAN is fully functional if the vCenter server is offline, since the vSAN management is done through the command interfaces of the ESXi’s.
In view of the above, the purpose of this manual is to share how to perform vSAN health status validation via command line.
Step 2: After connecting to the ESXi, we validate the health status of the vSAN by running the following command:
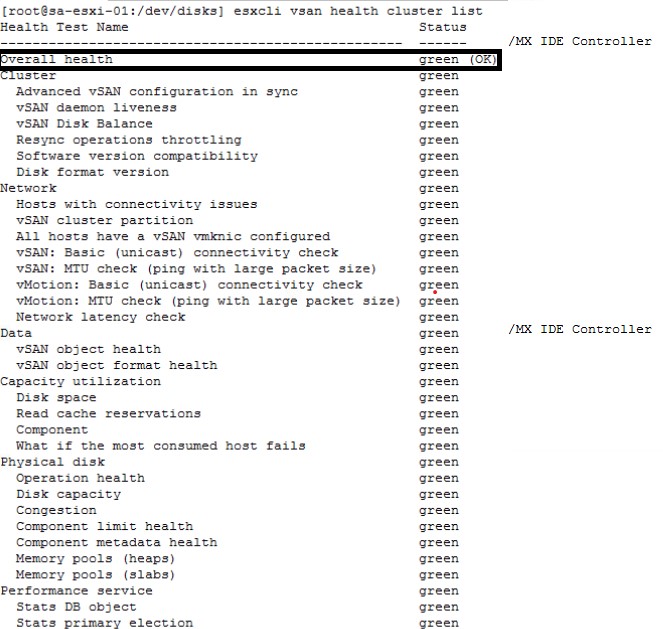
esxcli vsan health cluster list
This command is similar to the Skyline Health that is run from the vCenter Server and allows us to know how the vSAN is in the following levels:
- Overall
- Cluster
- Network
- Data
- Capacity Utilization
- Physical disk
- Performance services.
Generally speaking, when the vSAN is healthy, all values should be in green exactly as shown in the following image:
Step 3: Check the health status of the vSAN objects, which allows us to know how they are and if there are inaccessible objects. To do this, we execute the following command:
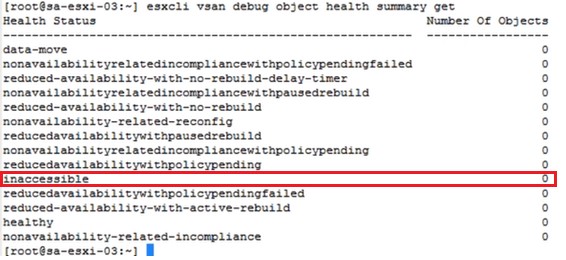
esxcli vsan debug object health summary get
It is important to highlight that all the values of the command output must be zero.
The following image shows a real example, where it can be seen that there are zero inaccessible objects, which indicates that the vSAN is healthy at the object level:
Step 4: Check the communication with the other vSAN members. This main step allows us to identify if there are failures in the communication with any ESXi. The command to execute is the following:
esxcli network ip neighbor list
The output of the command should list all the Mac Addresses of the vmknic of each ESXi and the type should be Dynamic.
The following image shows an example:
It is important to clarify that if the Mac Address column shows Incomplete and the Type column shows Invalid, this means that the host has communication problems.

It is important to clarify that if the Mac Address column shows Incomplete and the Type column shows Invalid, this means that the host has communication problems.
Step 5: Check communication with the vSAN vmk. This step is used to validate how the communication is at the level of the vmk designated exclusively for vSAN. It is important to know previously which is the vmk designated for vSAN. The command to run is the following:
esxcli network ip neighbor list -i vmk2 (vsan’s vmk)
The output of this command should give us the IP, the Mac Address, the Vmknic and the type for each of the ESXi’s that are part of the vSAN cluster.
An example is shown in the following illustration:

Step 6: Check communication with a specific vSAN member. This step is used to validate the communication with a particular vSAN member and each of its vmk. We can check vmk1, vmk2, vmk3 and the others that ESXi has. The command to execute is the following:
vmkping -I vmk2 XXdestinationXX -s -d
Where the -d option is to use the Dont’t Fragment bit in IPV4.
The -s option is to indicate the MTU size used in ESXi.
In the following image you can see the output of this command (the communication is being checked through the vmk1):

Example with partitioned vSAN
The following is a scenario where the VMware vSAN is partitioned.
Step 1: After logging in via SSH to the host, we run the command
esxcli vsan health cluster list and we find that there is a general networking problem, and the cluster is partitioned.
In the following image you can see the details of the reported failure:
esxcli vsan health cluster list
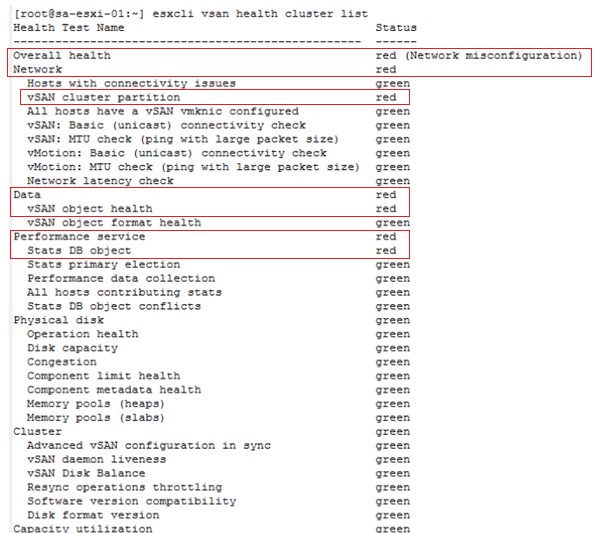
The above command tells us that the cluster is partitioned, so we continue throuble shooting and run the following command:
esxcli vsan health cluster get -t “vSAN cluster partition”.
The above command allows us to identify which hosts are partitioned, i.e. do not have communication at the vSAN level.
The following illustration shows that the host whose IP is 172.20.10.53 is partitioned, that is, isolated from the other vSAN members due to network failures:

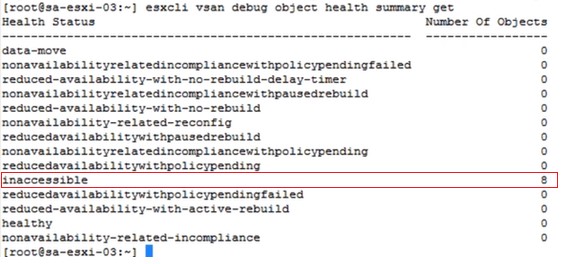
Step 2: We then run the command esxcli vsan debug object health summary get
and we get that there are 8 inaccessible objects which indicates that they are NOT accessible in the vSAN datastore.
The following image details the message:
Step 3: Check the communication with the other vSAN members by running the following command esxcli network ip neighbor list and we find that there is a host with communication problems.
The following image details the errors:

In conclusion, knowing how to check the health status of VMware vSAN through the command line is really important, because it helps us to identify in real time how the platform is doing and it is also very useful when failures happen with the vCenter Server.
Types of migrations using VMware
Virtualization has become one of the most widely used tools for companies to manage their computing resources. VMware is one of the most popular providers of virtualization solutions, offering a wide range of tools that allow users to easily migrate between different virtualization environments.
There are several types of migrations available from VMware, each one has its own features and benefits. Below, we describe the different types of migrations available:
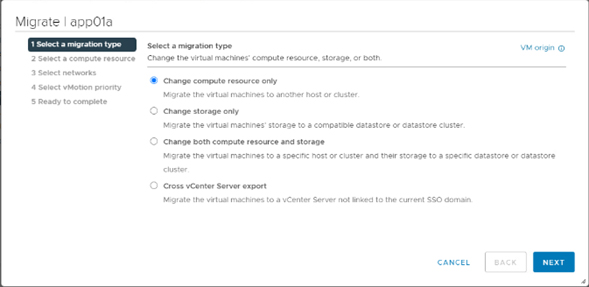
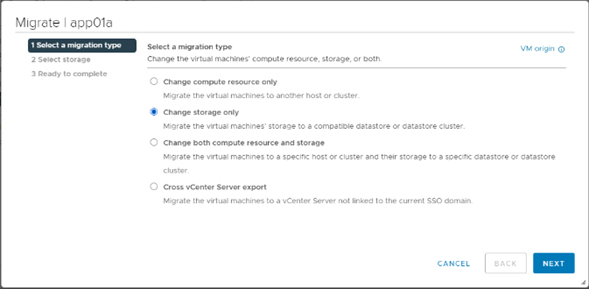
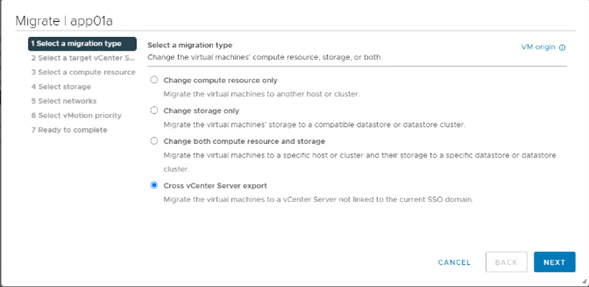
1). vMotion: this is a live migration that allows users to move virtual machines from one server to another without disruption, it means that applications and services will continue to run smoothly. vMotion works by moving virtual machine state from one server to another, without moving storage data, it makes the process go faster and does not require a large amount of bandwidth.
4). Cold Migration: This migration involves shutting down the virtual machine before migrating it. With cold migration, the system will stop the virtual machine, migrate the data and then start the virtual machine on the new server. This migration is useful for moving large virtual machines or virtual machines with limited hardware resources.
5). VMware Converter: This is a migration tool that allows users to convert physical machines to virtual machines or migrate virtual machines from one virtualization solution to another with different virtualization solutions.
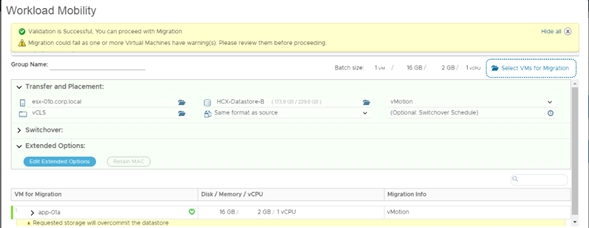
VMware HCX is an application mobility platform that enables users to migrate workloads between different cloud environments, regions and data centers.
HCX provides users with an end-to-end application migration platform, from planning and preparation to the actual migration. In addition, it offers a range of migration tools including vMotion, Cold Migration and Bulk Migration, allowing users to easily migrate their workloads to different cloud environments.
Different types of migrations can be performed with HCX, including:
- Hot migrations (vMotion): allows you to migrate a running virtual machine between different data centers, without service interruption.
- Cold migrations: Allows migrating a powered-off virtual machine between different data centers.
- Storage migrations: Allows migrating the storage of a virtual machine between different storage environments.
In conclusion, VMware offers a variety of migration tools that allow users to easily move their virtual machines between different virtualization environments. Choosing the right migration tool will depend on the specific requirements of each user.
Thanks for reading.
Blog by: Nicolas Rodriguez
Edited by: Diana Oviedo


