
Image management with Harbor in Tanzu
To start using images stored in our Harbor implementation in our deployments we must:
- Create a project within Harbor:
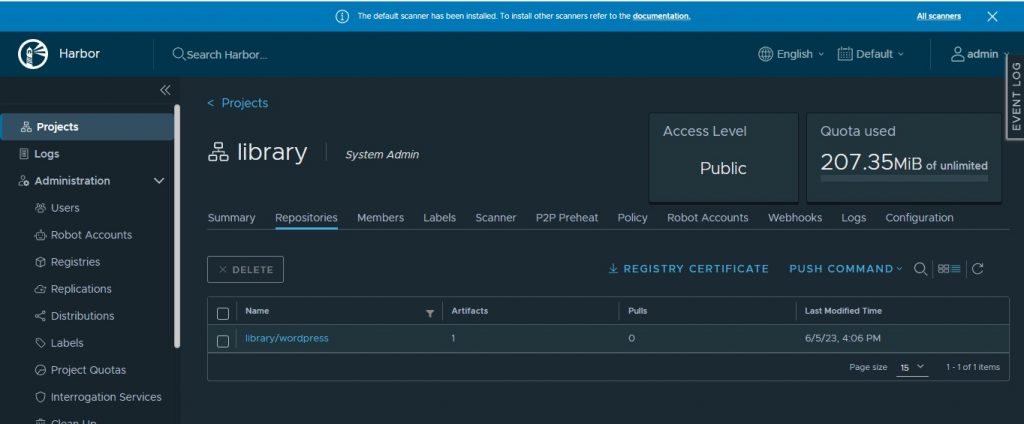
2. In our Bootstrap machine we must import the Harbor certificate. In this case we are using self signed certificates, to get it we have two options:
- Execute the following command:
https://nombe_de_dominio_de_harbor/api/v2.0/systeminfo/getcert
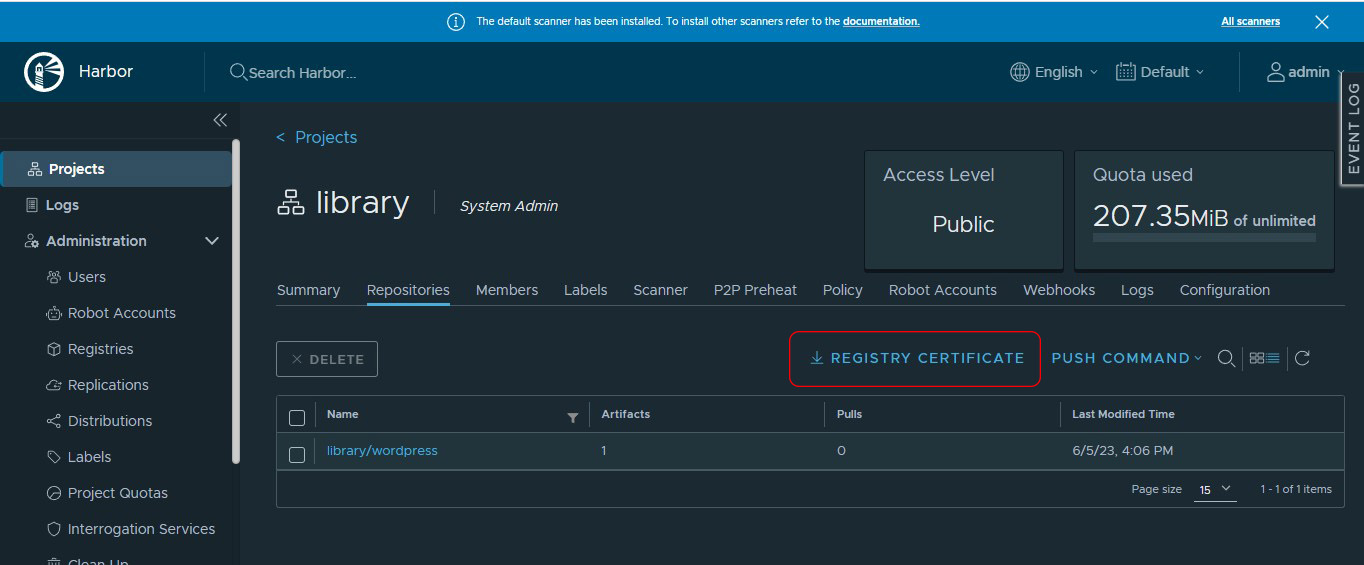
- From the Harbor graphical interface by clicking on the Registry Certificate option:


How is a moodle implemented?
Next we will give details of how to perform this implementation successfully and also indicate what are the prerequisites to carry out this activity:
To perform this activity you must have the following prerequisites:
- Linux Debian 11 0 operating system installed
- Have the SSH service installed and configured for remote access from any computer.

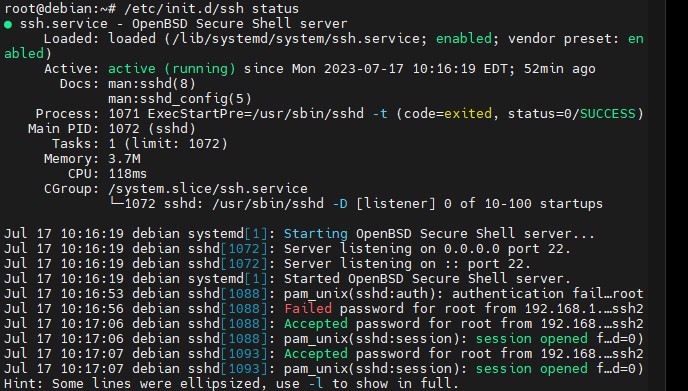
Step 1: Accessing and updating the system
Note: It is recommended to have the root user or a user that allows installing dependencies and services.
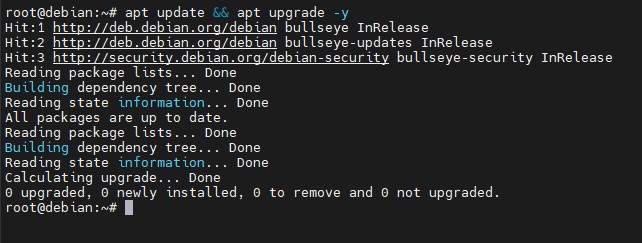
Previously we identify that we have a Debian version 11 operating system and proceed to install the updates and perform an upgrade of packages and services through the command:
apt update && apt upgrade -y
Step 2: install and configure apache
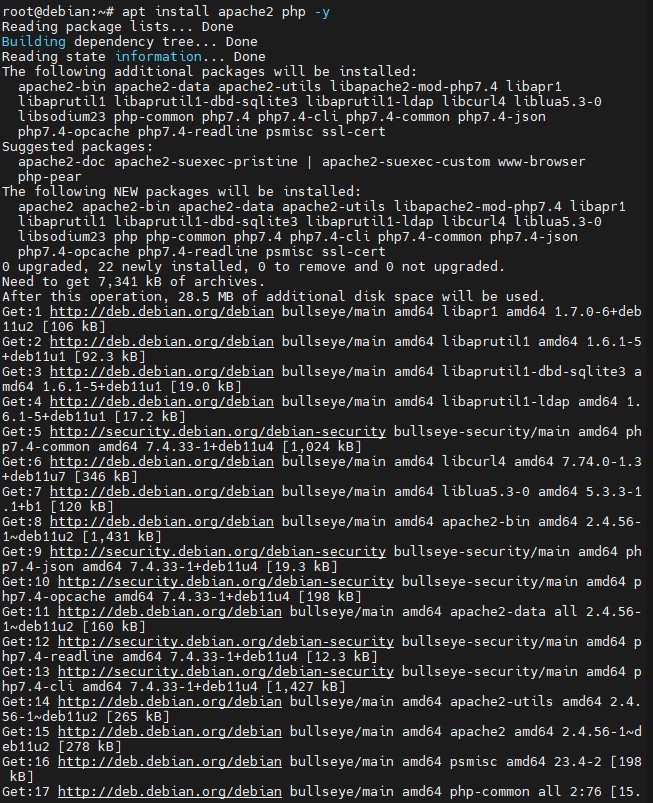
For any type of content management system a web service is required. For taxation apache will be used and is installed as follows:
apt install apache2 php -y
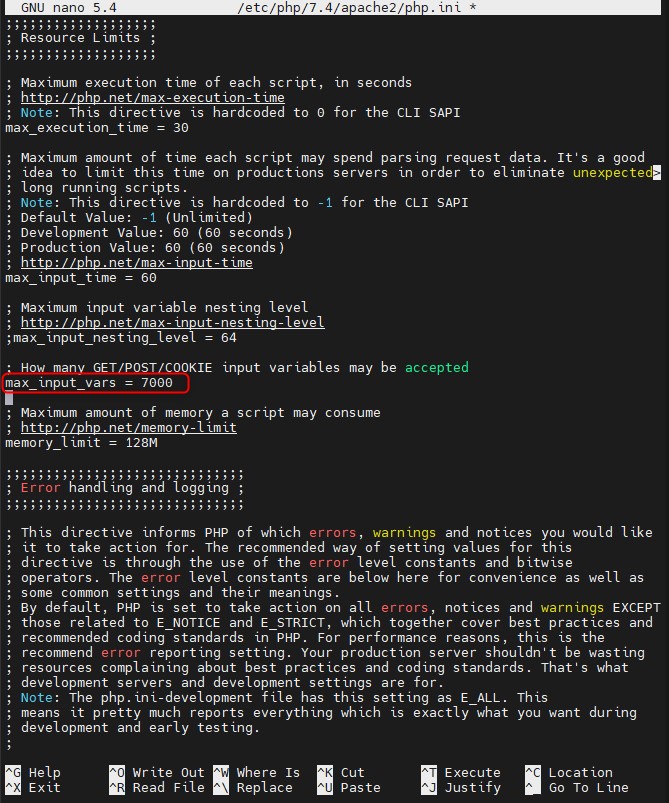
To improve the maximum allowed connections we recommend the max_input_vars = 7000 parameter, which is found in the file:
/etc/php/7.4/apache2/php.ini to 7000.
Using the following command nano /etc/php/7.4/apache2/php.
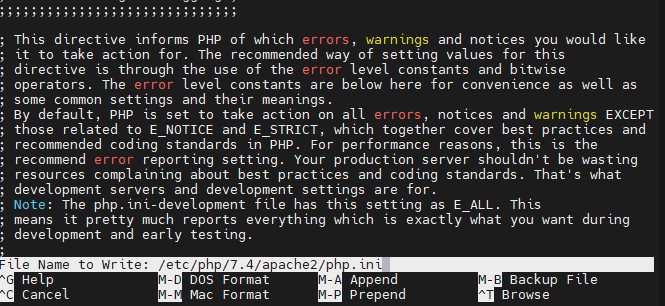
Using the command control + x we save the changes made.
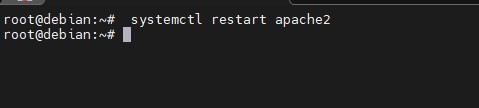
Then restart the service using the following command: systemctl restart apache2
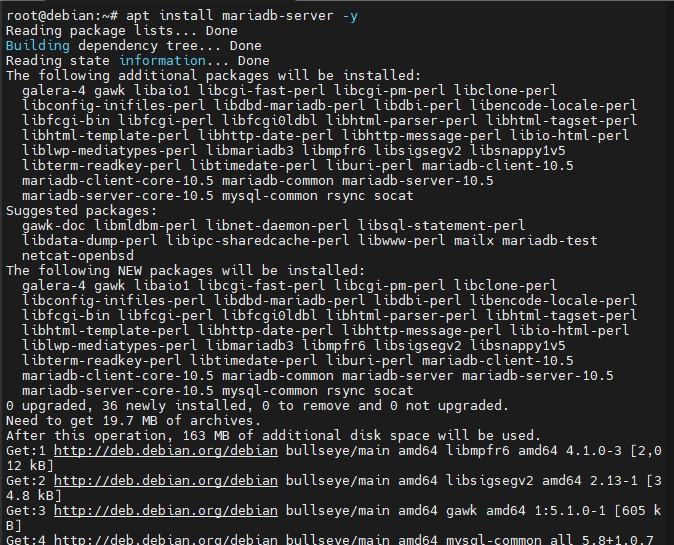
Step 3: install Maríadb
Moodle requires a database for users and information, so it is advisable to install Maríadb, since it is in the official Debian repositories and is installed with the following command:
apt install mariadb-server -y
After having this database installed, we proceed to secure it and it will be done with the following commands:
mysql_secure_installation
It is recommended to assign a strong password.
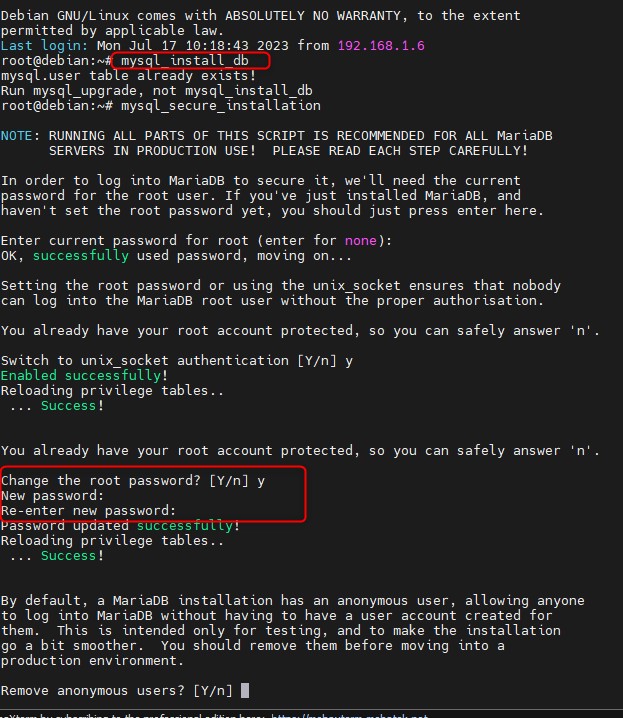
Remove the Anonymous user.

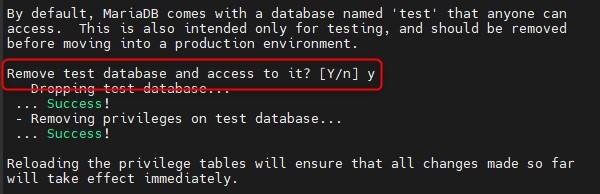
Remove the test database.
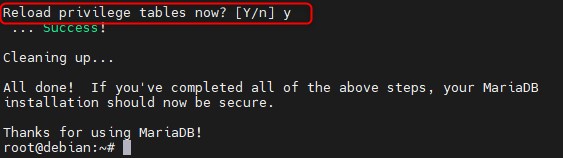
Apply changes on the configuration.
Then, proceed to create a database where moodle and users will be stored with the following commands:
- mysql -u root -p login with the previously created password.

2. Create moodle database using: CREATE DATABASE moodle_db DEFAULT CHARACTER SET utf8mb4 COLLATE utf8mb4_unicode_ci;;
3. Create Moodle user in the mysql database using CREATE USER moodle_user@’localhost’ IDENTIFIED BY ‘m0d1fyth15’;
4. Assign privileges to the user and database using GRANT ALL on moodle_db.* to moodle_user@localhost;
5. Apply changes using FLUSH PRIVILEGES;
6. Exit using \q
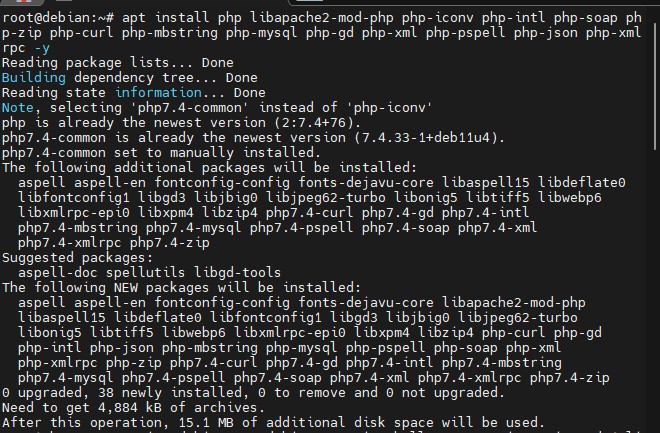
Step 4: Install PHP
Any web content requires the use of php, for this all php extensions are installed through the command:
apt install php libapache2-mod-php php-iconv php-intl php-soap php-zip php-curl php-mbstring php-mysql php-gd php-xml php-pspell php-json php-xmlrpc -y
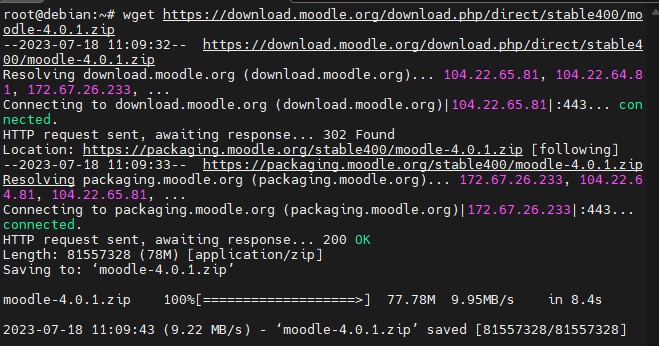
Step 5: Download Moodle
1. Now you will download the stable version of moodle from its official site https://download.moodle.org/releases/latest/ using the command wget https://download.moodle.org/download.php/direct/stable400/moodle-4.0.1.zip
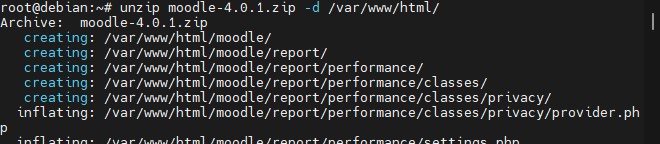
2. Extract the file using a zip file that must be previously installed (apt install unzip -y) and send it to the folder located in /var/www/html/ using the following command:
unzip moodle-4.0.1.zip -d /var/www/html/
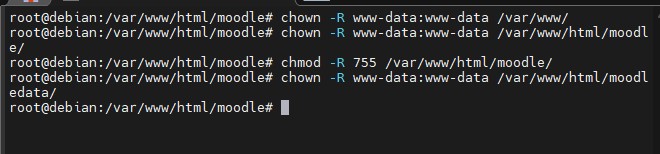
3. Create the directory with: mkdir /var/www/html/moodledata
4. Assign permissions to the directories and rename in apache using the following commands:
chown -R www-data:www-data /var/www/
chown -R www-data:www-data /var/www/html/moodle/
chmod -R 755 /var/www/html/moodle/
chown -R www-data:www-data /var/www/html/moodledata/
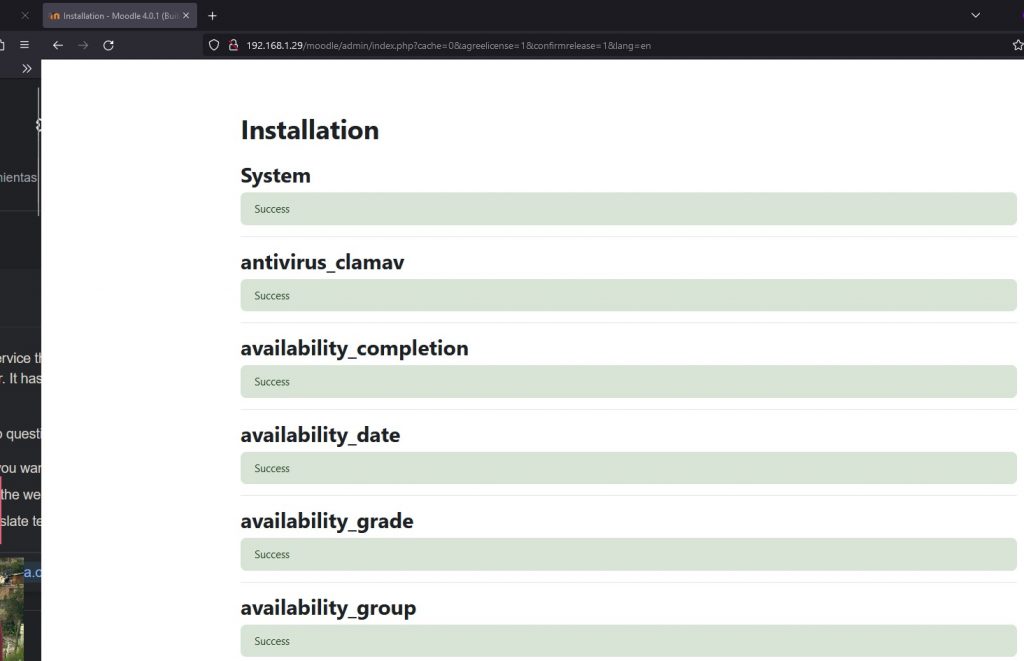
5. Finally, we proceed to install moodle in the web way
Accessing http://192.168.1.29/moodle/install.php
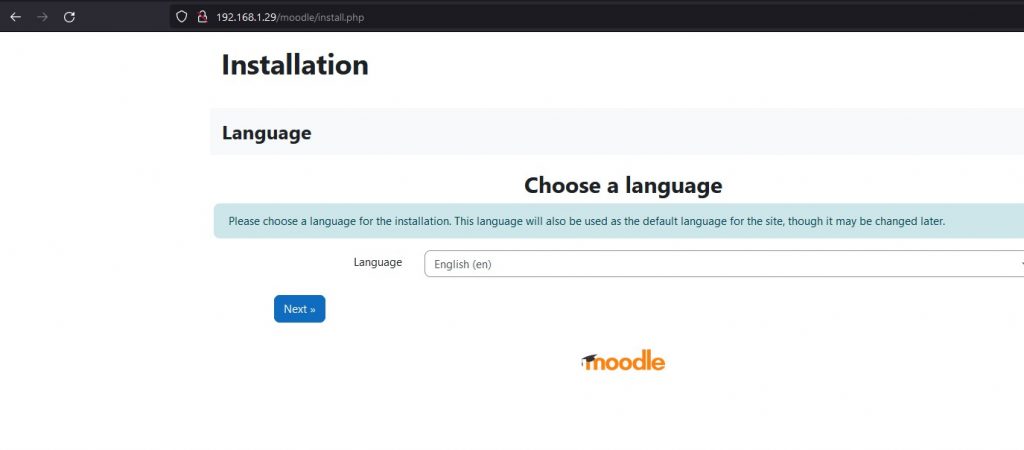
Click on next.
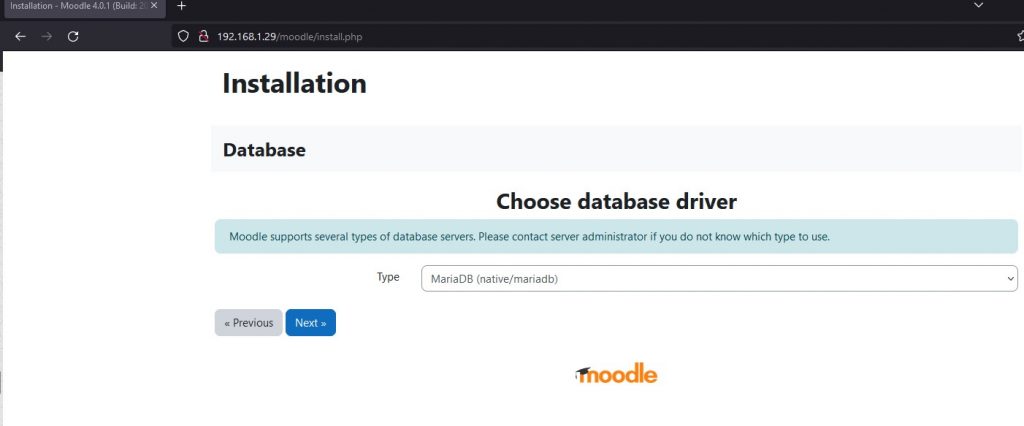
Configure the url providing the indicated data.

Configure the database using MariaDB.
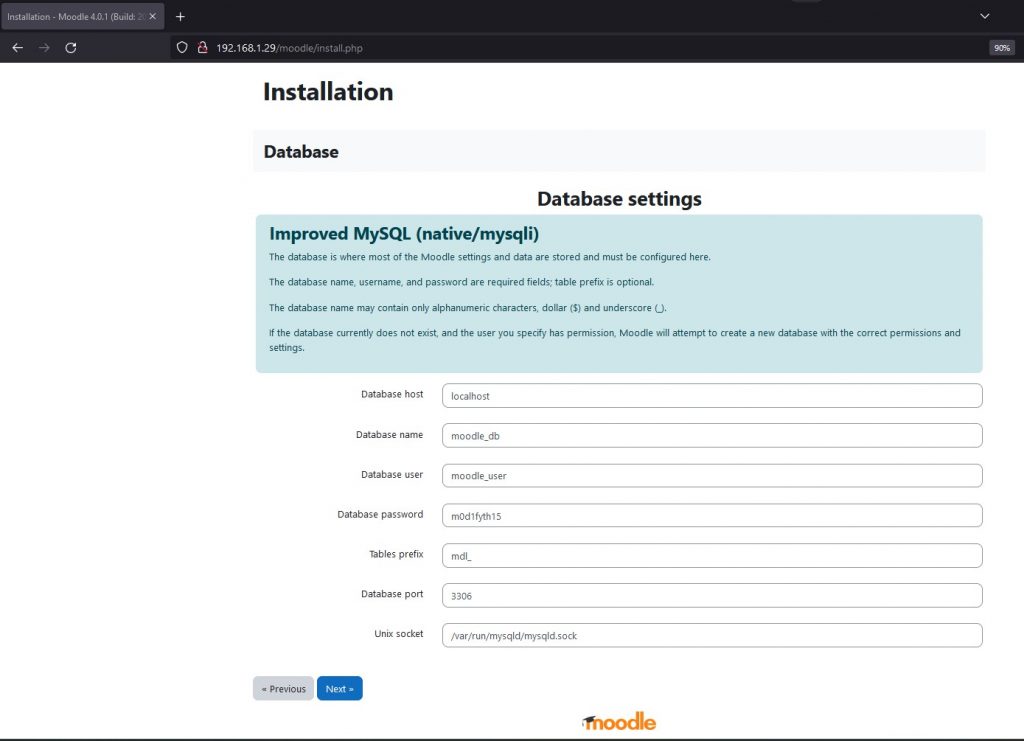
Provide the information of the configured database and click on next.
And in the path configure the parameter $CFG->dbtype y agregar ‘mariadb’;//’mysqli’;
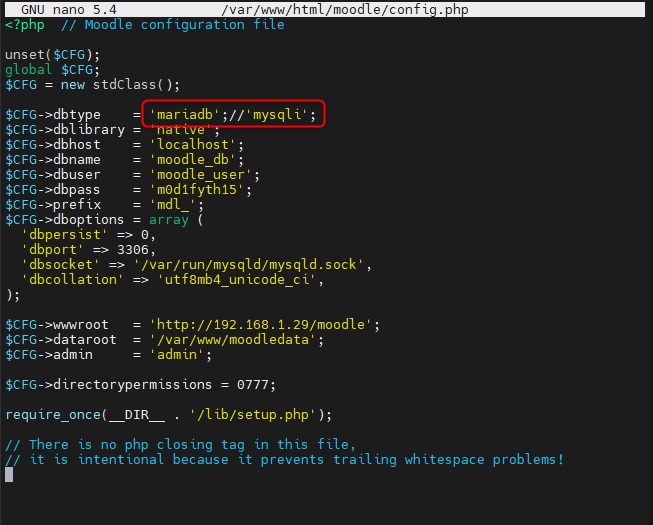
Finally, restart the apache service
/etc/init.d/apache2 restart
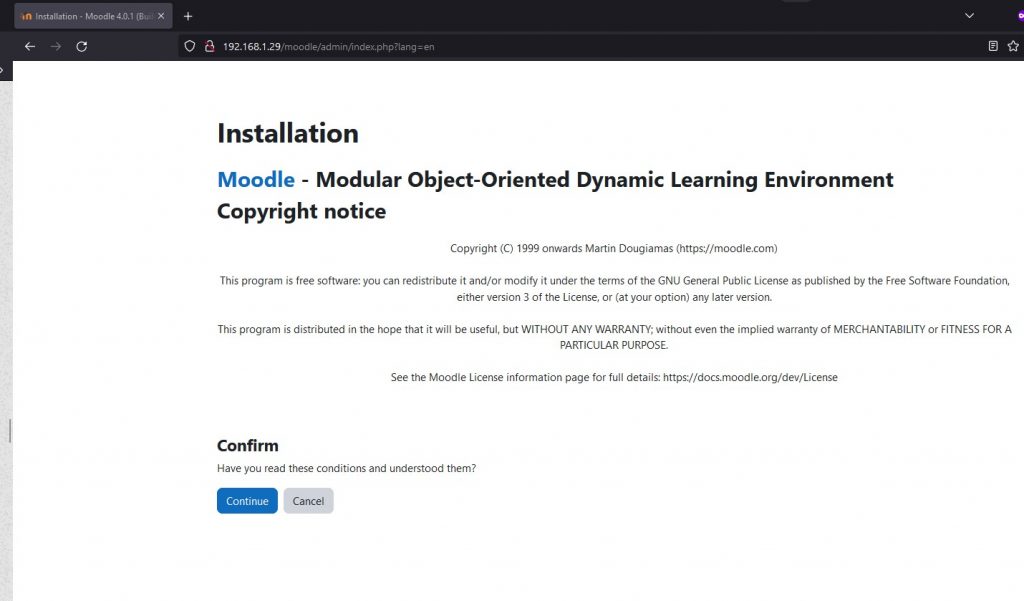
Accept the conditions and click next.
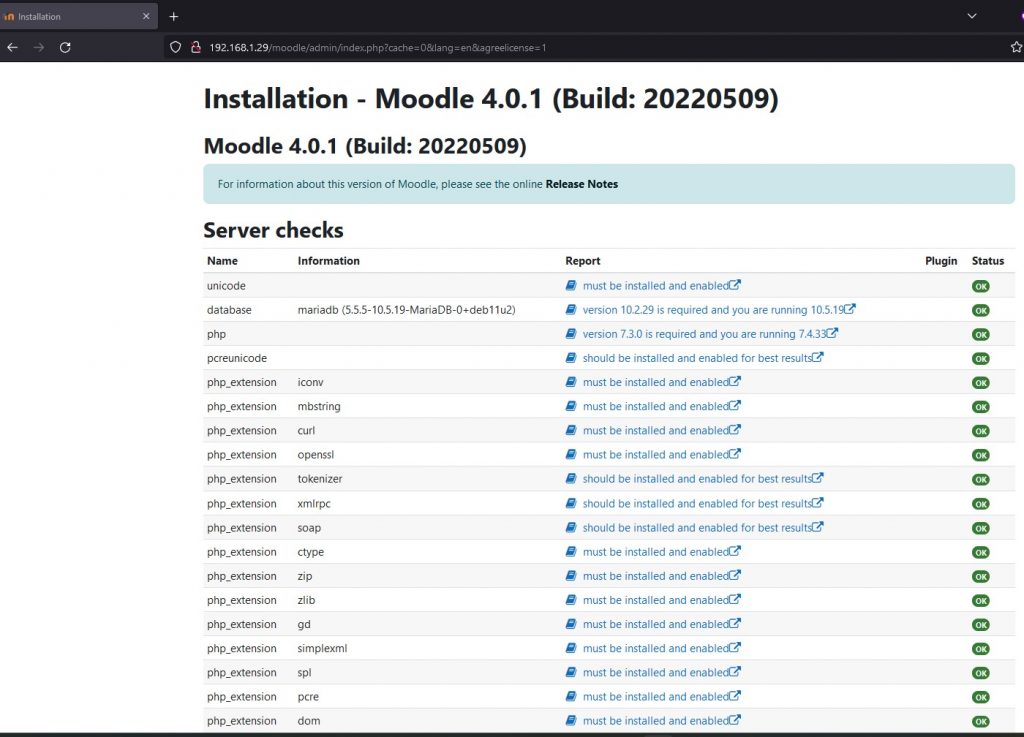
Verify that it fulfills the requested requirements and click continue.
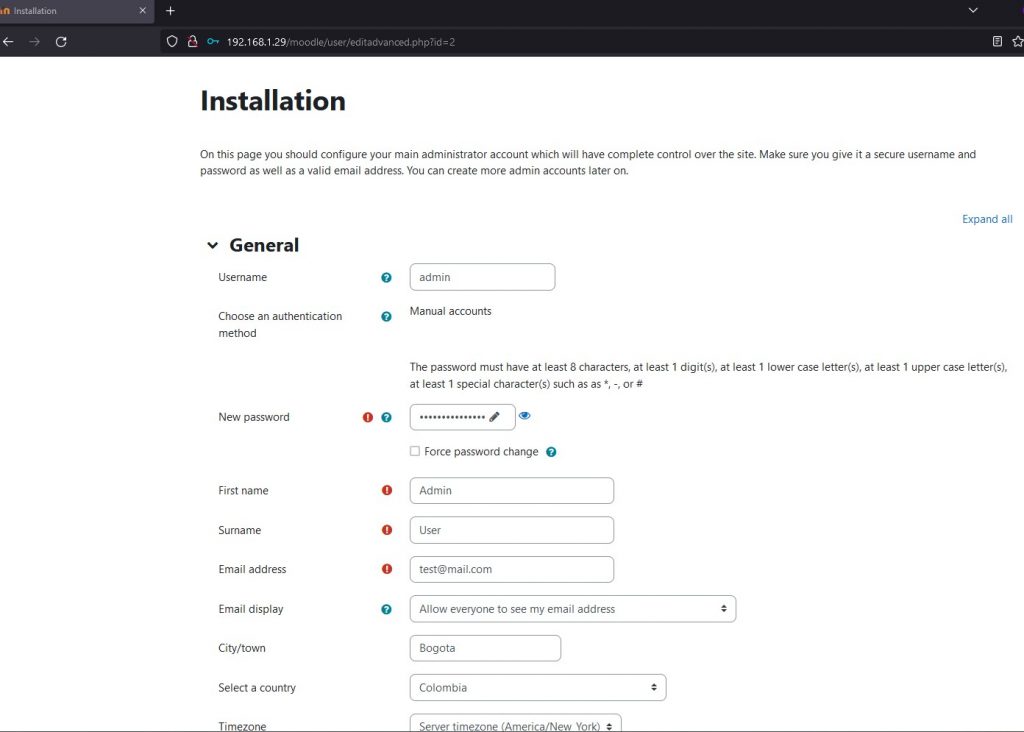
Fill in the profile data and click on update profile.
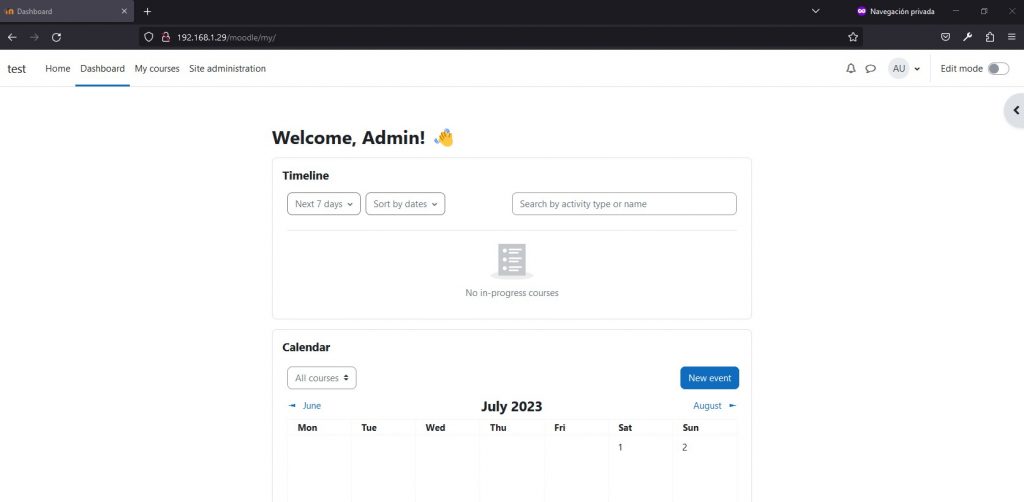
After making these settings, finish the installation and access the dashboard as administrator.

CHECK VSAN HEALTH
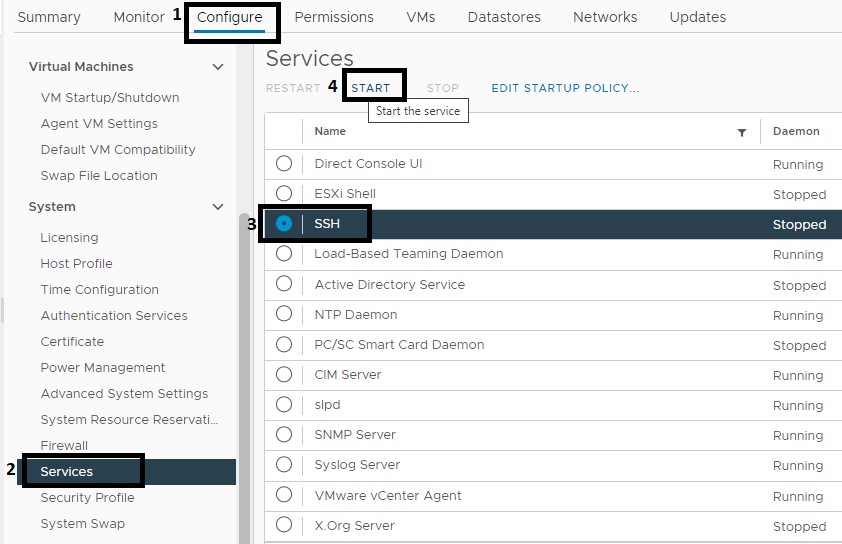
Step 1: Connect to an ESXi via SSH with root credentials.
In this step, it is important to previously enable the SSH service on the ESXi, which is done from the Configure>Services tab, then select SSH and click START at the top.
The following image details the step by step:
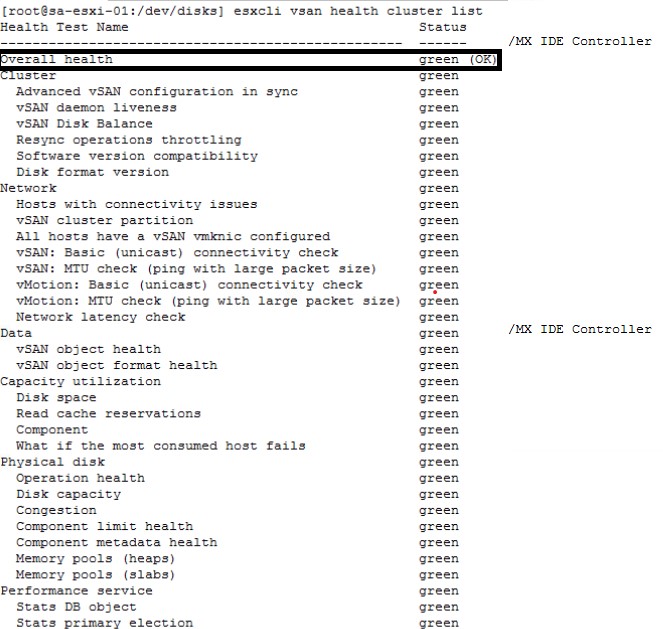
Step 2: After connecting to the ESXi, we validate the health status of the vSAN by running the following command:
esxcli vsan health cluster list
This command is similar to the Skyline Health that is run from the vCenter Server and allows us to know how the vSAN is in the following levels:
- Overall
- Cluster
- Network
- Data
- Capacity Utilization
- Physical disk
- Performance services.
Generally speaking, when the vSAN is healthy, all values should be in green exactly as shown in the following image:
Step 3: Check the health status of the vSAN objects, which allows us to know how they are and if there are inaccessible objects. To do this, we execute the following command:
esxcli vsan debug object health summary get
It is important to highlight that all the values of the command output must be zero.
The following image shows a real example, where it can be seen that there are zero inaccessible objects, which indicates that the vSAN is healthy at the object level:

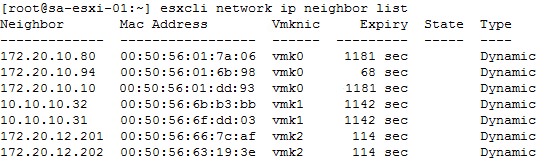
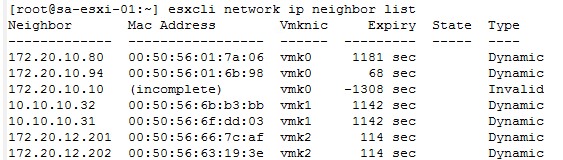
Step 4: Check the communication with the other vSAN members. This main step allows us to identify if there are failures in the communication with any ESXi. The command to execute is the following:
esxcli network ip neighbor list
The output of the command should list all the Mac Addresses of the vmknic of each ESXi and the type should be Dynamic.
The following image shows an example:
It is important to clarify that if the Mac Address column shows Incomplete and the Type column shows Invalid, this means that the host has communication problems.
It is important to clarify that if the Mac Address column shows Incomplete and the Type column shows Invalid, this means that the host has communication problems.
Step 5: Check communication with the vSAN vmk. This step is used to validate how the communication is at the level of the vmk designated exclusively for vSAN. It is important to know previously which is the vmk designated for vSAN. The command to run is the following:
esxcli network ip neighbor list -i vmk2 (vsan’s vmk)
The output of this command should give us the IP, the Mac Address, the Vmknic and the type for each of the ESXi’s that are part of the vSAN cluster.
An example is shown in the following illustration:

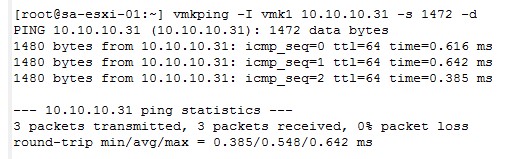
Step 6: Check communication with a specific vSAN member. This step is used to validate the communication with a particular vSAN member and each of its vmk. We can check vmk1, vmk2, vmk3 and the others that ESXi has. The command to execute is the following:
vmkping -I vmk2 XXdestinationXX -s -d
Where the -d option is to use the Dont’t Fragment bit in IPV4.
The -s option is to indicate the MTU size used in ESXi.
In the following image you can see the output of this command (the communication is being checked through the vmk1):
Example with partitioned vSAN
The following is a scenario where the VMware vSAN is partitioned.
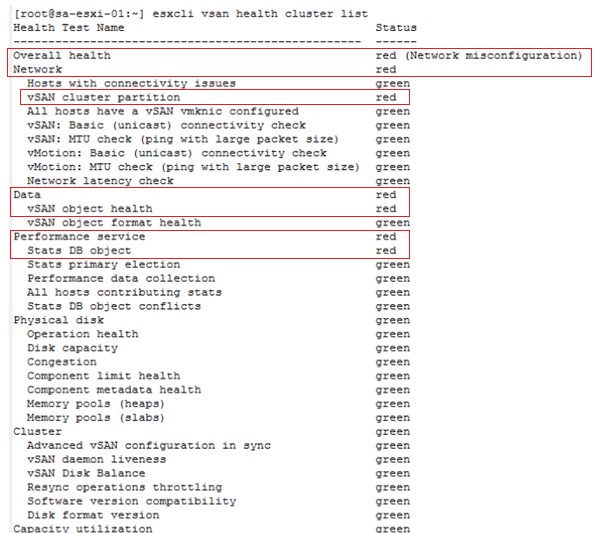
Step 1: After logging in via SSH to the host, we run the command
esxcli vsan health cluster list and we find that there is a general networking problem, and the cluster is partitioned.
In the following image you can see the details of the reported failure:
esxcli vsan health cluster list
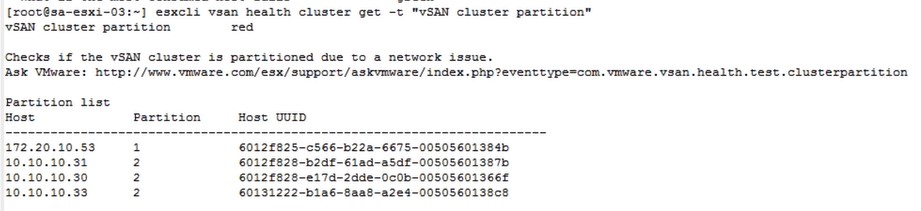
The above command tells us that the cluster is partitioned, so we continue throuble shooting and run the following command:
esxcli vsan health cluster get -t “vSAN cluster partition”.
The above command allows us to identify which hosts are partitioned, i.e. do not have communication at the vSAN level.
The following illustration shows that the host whose IP is 172.20.10.53 is partitioned, that is, isolated from the other vSAN members due to network failures:
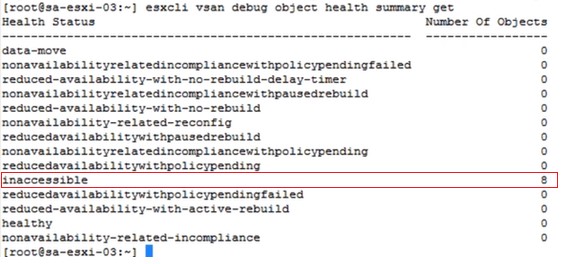
Step 2: We then run the command esxcli vsan debug object health summary get
and we get that there are 8 inaccessible objects which indicates that they are NOT accessible in the vSAN datastore.
The following image details the message:
Step 3: Check the communication with the other vSAN members by running the following command esxcli network ip neighbor list and we find that there is a host with communication problems.
The following image details the errors:


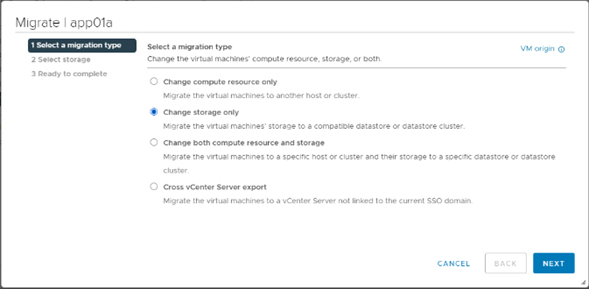
Types of migrations using VMware
1). vMotion: this is a live migration that allows users to move virtual machines from one server to another without disruption, it means that applications and services will continue to run smoothly. vMotion works by moving virtual machine state from one server to another, without moving storage data, it makes the process go faster and does not require a large amount of bandwidth.

2). Storage vMotion: this is a useful tool for load balancing, migrating data between different hard disks, changing its locations and consolidating data.
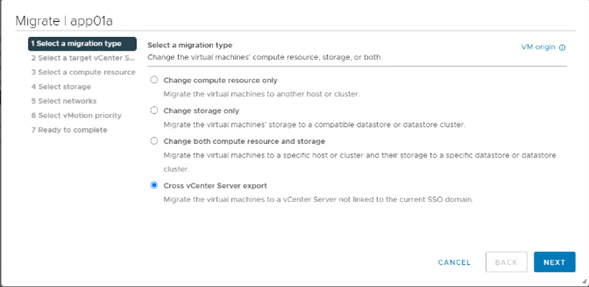
3). Cross vCenter vMotion: This migration is useful when you need to migrate a virtual machine from one data center to another.
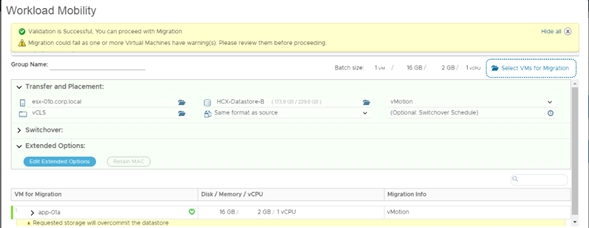
VMware HCX is an application mobility platform that enables users to migrate workloads between different cloud environments, regions and data centers.
HCX provides users with an end-to-end application migration platform, from planning and preparation to the actual migration. In addition, it offers a range of migration tools including vMotion, Cold Migration and Bulk Migration, allowing users to easily migrate their workloads to different cloud environments.
Different types of migrations can be performed with HCX, including:
- Hot migrations (vMotion): allows you to migrate a running virtual machine between different data centers, without service interruption.
- Cold migrations: Allows migrating a powered-off virtual machine between different data centers.
- Storage migrations: Allows migrating the storage of a virtual machine between different storage environments.

In conclusion, VMware offers a variety of migration tools that allow users to easily move their virtual machines between different virtualization environments. Choosing the right migration tool will depend on the specific requirements of each user.
Thanks for reading.
Blog by: Nicolas Rodriguez
Edited by: Diana Oviedo

ANATOMÍA DE VMWARE HCX – PARTE I

DEFINICIÓN
VMware HCX (Hybrid Cloud Extension) es un producto que permite extender redes entre diferentes ambientes VMware vSphere, de tal manera que permite migrar cargas de trabajo a otros entornos VMware vSphere de manera trasparente: VMware Cloud on Amazon (VMC), VMware on Azure (AVS), Google Cloud Plaftorm (GCP), entre otras que se espera reciban el servicio de VMware vSphere en la nube (nombre asignado en cada plataforma). HCX es recomendado para los siguientes casos de uso sin necesidad de hacer cambios profundos en la infraestructura:
- Extensión de redes
- Migración de máquinas virtuales
- Protección ante un desastre
Para cumplir con lo anterior, HCX presenta una serie de servicios que finalmente se van a ver reflejados en los appliances desplegados:
- Hybrid Interconect
- WAN Optimization
- Cross-Cloud vMotion Migration
- Bulk Migration
- Replication Assisted vMotion Migration
- Network Extension
- Disaster Recovery
- SRM Integratioh
- OS Assisted Migration
HCX también contiene otros servicios adicionales a los ya tradicionales como el de “Replicación y de recuperación de Desastre”. Además existen más modernos como la “Replicación desde ambientes no vSphere” para una cantidad de sistemas operativos por ahora limitado.
Sistemas Operativos Linux Soportados (OS Assisted Migration)

Sistemas Operativos Windows Soportados (OS Assisted Migration)

ARQUITECTURA
El sistema requiere dos ambientes VMware vSphere los cuales deberán alcanzarse a nivel de redes en su
capa de gestión. Esto se puede hacer con un tipo de conexión dedicada, VPN, o interconexiones que ofrecen los proveedores de nube como Direct Connect / Express Route. Es recomendable un buen ancho de banda en el canal, dado que esto determina la velocidad de copia de información (dato importante a tener en cuenta en las migraciones), así como poder establecer RTO/RPO adecuados.
En este ambiente se desplegará los HCX Manager tanto Enterprise Manager como el Cloud Manager, que veremos más adelante.

Es un requisito indispensable que el sitio destino tenga el producto NXS-T el cual permitirá tomar la funcionalidad de Red Overlay para la extensión de redes y migración de las mismas sin interrupción.
El detalle de puertos necesarios entre sitios se puede encontrar en la siguiente URL con más detalle: https://hcx.design/2019/12/13/hcx-network-port-diagrams/


|
Produc t |
Releases |
Port |
Protocol |
Source |
Destination |
Service Description |
|
VMware HCX |
HCX Service |
3103 1 |
TCP |
ESXi Management or Replication Network |
Interconnect (HCX- IX) |
HCX Bulk Migration / Disaster Recovery |
|
VMware HCX |
HCX Service |
902 |
TCP |
vCenter Server |
Interconnect (HCX- IX) |
Network File Copy (NFC) based Cold Migrations |
|
VMware HCX |
HCX Service |
443 |
TCP |
Interconnect (HCX-IX) |
vCenter Server |
VPXA Listener |
|
VMware HCX |
HCX Service |
22 |
TCP |
HCX Admin |
HCX Manager |
Secure shell connection is used to launch the HCX Central CLI |
|
VMware HCX |
HCX Service |
443 |
TCP |
HCX Admin |
HCX Manager |
Configure and Manage HCX Services |
|
VMware HCX |
HCX Service |
9443 |
TCP |
HCX Admin |
HCX Manager |
Activate and Register vCenter Server and Management Systems. |
|
VMware HCX |
HCX Service |
443 |
TCP |
HCX Manager |
Interconnect (HCX- IX) |
HCX vMotion Control |
|
VMware HCX |
HCX Service |
8123 |
TCP |
HCX Manager |
Interconnect (HCX- IX) |
HCX Bulk Migration Control |
|
VMware HCX |
HCX Service |
9443 |
TCP |
HCX Manager |
Interconnect (HCX- IX), Network Extension (HCX-NE) |
HCX Internal Control |
|
VMware HCX |
HCX Service |
80 |
TCP |
HCX Manager |
ESXi Management Network |
OVF Import / Service Appliance Deployment |
|
VMware HCX |
HCX Service |
902 |
TCP |
HCX Manager |
ESXi Management Network |
OVF Import / Service Appliance Deployment |
|
VMware HCX |
HCX Service |
514 |
TCP/UDP |
Interconnect (HCX-IX) |
Syslog Server |
Syslog Originator to Syslog Collector |
|
VMware HCX |
HCX Service |
443 |
TCP |
vCenter Server |
Interconnect (HCX- IX) |
Control traffic for HCX vMotion migration operations. |
|
VMware HCX |
HCX Service |
902 |
UDP |
Interconnect (HCX-IX) |
vCenter Server |
HCX vMotion Control |
|
VMware HCX |
HCX Service |
80, 443 |
TCP |
Interconnect (HCX-IX) |
ESXi Management Network |
ESX Authentication |
|
VMware HCX |
HCX Service |
8000 |
TCP |
Interconnect (HCX-IX) |
ESXi vMotion Network |
HCX vMotion Protocol |
|
VMware HCX |
HCX Service |
8000 |
TCP |
ESXi vMotion Network |
Interconnect (HCX- IX) |
HCX vMotion Protocol |
|
VMware HCX |
HCX Service |
902 |
TCP |
Interconnect (HCX-IX) |
ESXi Management Network |
HCX Cold Migration (bidirectional) |
|
VMware HCX |
HCX Service |
902 |
TCP |
ESXi Management Network |
Interconnect (HCX- IX) |
HCX Cold Migration (bidirectional) |
|
VMware HCX |
HCX Service |
443 |
TCP |
HCX Manager (Cloud) |
vCloud Director |
vCloud Director API (Additional requirement at the Destination with vCloud Director-based installations) |
|
VMware HCX |
HCX Service |
5672 |
TCP |
HCX Manager (Cloud) |
AMQP/RabbitMQ Broker |
Advanced Message Queue Protocol (Additional requirement at the Destination with vCloud Director-based installations) |
|
VMware HCX |
HCX Service |
443 |
TCP |
vRealize Operations Manager |
HCX Manager |
Collection of HCX metrics for vRealize Operations. |
|
VMware HCX |
HCX Service |
443 |
TCP |
HCX Sentinel Agent on Virtual Machine |
Sentinel Gateway (HCX-SGW) |
HCX Sentinel Agent Virtual Machine Data Transfer |
|
VMware HCX |
HCX Service |
9443 |
TCP |
HCX Manager (Cloud/Destination) |
Sentinel Data Receiver (HCX-SDR |
HCX Service Appliance Configuration and Control |
|
VMware HCX |
HCX Service |
9443 |
TCP |
HCX Manager (Connector/Source) |
Sentinel Gateway (HCX-SGW) |
HCX Service Appliance Configuration and Control |
|
VMware HCX |
HCX Service |
443 |
TCP |
vCenter Server |
HCX Manager |
HCX HTTPS |
|
VMware HCX |
HCX Service |
514 |
TCP/UDP |
HCX Manager |
Syslog Server |
Syslog Originator to Syslog Collector |
|
VMware HCX |
HCX Service |
123 |
TCP |
HCX Manager |
NTP Server |
Time Synchronization |
|
VMware HCX |
HCX Service |
53 |
TCP/UDP |
HCX Manager |
DNS Server |
Name Resolution |
|
VMware HCX |
HCX Service |
443 |
TCP |
HCX Manager |
NSX Manager |
NSX API. Optional at the Source (if NSX networks will not be extended). Required at the Destination (SDDC). |
|
VMware HCX |
HCX Service |
7444 |
TCP |
HCX Manager |
vCenter Server |
vSphere 5.0 SSO, Lookup Service |
|
VMware HCX |
HCX Service |
9443 |
TCP |
HCX Manager |
vCenter Server |
Web-client/Plug-in |
|
VMware HCX |
HCX Service |
443 |
TCP |
HCX Manager |
vCenter Server |
vSphere API, vSphere 6.0+ SSO Lookup Service |
|
VMware HCX |
HCX Service |
443 |
TCP |
HCX Manager (Connector) |
HCX Manager (Cloud) |
Site Pairing and ongoing authentication and management of HCX service jobs coordinated across the paired environments. |
|
VMware HCX |
HCX Service |
4500 |
UDP |
Network Extension (HCX-NE at Source) |
Network Extension (HCX-NE at Destination) |
The NET-EXT transport path is used when virtual machines in the source network communicate with virtual machines in the HCX Extended network. |
|
VMware HCX |
HCX Service |
4500 |
UDP |
Interconnect (HCX-IX at Source) |
Interconnect (HCX- IX at Destination) |
The IX transport path carries HCX migration and DR traffic. |
|
VMware HCX |
HCX Service |
902 |
TCP |
Interconnect (HCX-IX) |
ESXi NFC Network |
HCX Bulk Migration data path |
|
VMware HCX |
HCX Service |
443 |
TCP |
HCX Manager |
ESXi Management Network |
OVF Import / Service Appliance Deployment. HCX Bulk Migration Control Connections |
|
VMware HCX |
HCX Service |
443 |
TCP |
HCX Manager (Connector & Cloud) |
hybridity- depot.vmware.com |
Activation and service updates |
|
VMware HCX |
HCX Service |
443 |
TCP |
HCX Manager (Connector & Cloud) |
connect.hcx.vmwar e.com |
Connections initiated from every HCX Manager system for activation, publishing system updates, and enhanced support. |
|
VMware HCX |
HCX Service |
4450 0 to 4450 2 |
TCP |
Interconnect (HCX-IX at Destination) |
Sentinel Data Receiver (HCX-SDR at Destination) |
Virtual Machine Data Transfer |
|
VMware HCX |
HCX Service |
4450 0 to 4460 0 |
TCP |
Sentinel Gateway (HCX-SGW at Source) |
Interconnect (HCX- IX at Source) |
Virtual Machine Data Transfer |
|
VMware HCX |
HCX Service |
TCP |
4500 |
HCX-IX-I (Initiator at the Source) |
HCX-IX-R (Receiver at the Destination) |
CCLI Perftest for Site to Site Connectivity and Performance Diagnostics |
|
VMware HCX |
HCX Service |
TCP |
4500 |
HCX-NE-I (Initiator at the Source) |
HCX-NE-R (Receiver at the Destination) |
CCLI Perftest for Site to Site Connectivity and Performance Diagnostics |
|
VMware HCX |
HCX Service |
Type 8, Type 0 |
ICMP Echo, ICMP Echo Reply |
HCX-IX-I (Initiator at the Source) |
HCX-IX-R (Receiver at the Destination) |
CCLI Perftest for Site to Site Connectivity and Performance Diagnostics |
|
VMware HCX |
HCX Service |
Type 8, Type 0 |
ICMP Echo, ICMP Echo Reply |
HCX-NE-I (Initiator at the Source) |
HCX-NE-R (Receiver at the Destination) |
CCLI Perftest for Site to Site Connectivity and Performance Diagnostics |
Es recomendable que los appliances que se van a desplegar estén en la misma red de gestión del vCenter. Si se encuentran en otra, necesita los permisos en el firewall corporativo para garantizar que la solución opere de manera adecuada.
Ahora, ¿Cómo funciona todo esto?
Tenemos dos sitios que deseamos comunicar para poder hacer uso de las bondades de HCX. En la arquitectura general hay uno que se define como origen y otro como destino. Este último tiene que contar con NSX-T como requisito principal. Este es el diseño más básico dado que pueden existir otros sitios que se pueden agregar. El proceso consiste en los siguientes pasos:
- Descargar la OVA con la cuenta de My VMware de HCX
- Desplegar el appliance en el sitio destino, que en adelante se le llamará “HCX Cloud”
- Licenciar y configurar HCX Cloud (generalmente la licencia se establece con una llave que se obtiene desde el portal de MyVMware para clientes catalogados como Services Provider / Cloud Provider y que están bajo un modelo de licenciamiento VCPP). Esto se hará por medio de RestAPI con un cliente como Postman (este proceso está fuera de este post). Para ello VMware cuenta con un collection que se puede importar y facilita la obtención de dichas llaves
- Una vez configurado el HCX Cloud, se procede a desplegar el appliance en el sitio remoto, en este punto la arquitectura soportada corresponde al despliegue de un HCX Enterprise Manager (en literatura anterior se conoce a este appliance como HCX Connector). Es importante destacar que con base a los documentos de diseño este appliance se debe desplegar desde una OVA descargada del HCX Cloud o desde un enlace que este mismo habilita. No se debe desplegar desde la OVA original descargada de VMWare.
- Licencias y configurar HCX Enterprise
- Realizar el pairing entre el HCX Cloud y el HCX Enterprise Manager
- Configurar los Network Profile
- Configurar los Compute Profile
- Configurar el Mesh
- Desplegar los Appliances
Probar las diferentes funcionalidades de migración DESPLIEGUE
Considerar que para estas labores es importante tomar un snapshot del vCenter por si se llega a tener algún inconveniente poder volver al estado inicial. Así:
- Asignación de IPs para los appliances
- Registro DNS para los appliances (Validar consulta directa e inversa a los DNS)
- Alcance al servidor NTP desde las redes donde se desplegarán los appliances
- El appliances debe alcanzar la web vmware.com para poder ser licenciado
- Validar entre los sitios remotos el alcance de los vCenter por el puerto 44
SITIO DESTINO – HCX CLOUD
Aquí un breve resumen de la configuración del appliance:
- Una vez descargada la OVA se procede con el despliegue

2. Alguna información como el DataStore donde se va a desplegar

3. De igual manera la red donde estará el appliance

4. Información general del appliances: usuario, contraseñas, hostname, información de red, entre otros

5. Validar el resumen y terminar

6. Una vez la VM haya subido, configurar el appliance con la información del ambiente

7. Ingresar por el FQDN definido por el puerto 9443. Las credenciales serán las definidas en el momento del despliegue

8. Iniciamos con el proceso de licenciar el appliance que debe tener salida a internet, como se mencionó anteriormente

9. Ubicación del sistema

10.Establecer el nombre


11.SSO/PSC despliegues recientes tiene el PSC embebido en el vCSA por lo que será la url del vCSA


12. Hay que reiniciar algunos servicios para que el sistema quede en línea

13. Validar que los servicios hayan subido con normalidad

14. De igual manera la integración con vCenter y NSX

15. Después de esto, es importante ajustar los roles que en general deberían estar dentro del dominio “local”. Si este fue cambiado al desplegar el vCenter, se debe modificar el que corresponda

16. Revisión de la integración con vCenter debe aparecer el plugin de HCX en la interface gráfica


SITIO ORIGEN – HCX ENTERPRISE MANAGER
El proceso para el despliegue de este appliance es similar al del HCX Cloud. Aquí solo vamos a detallar de dónde obtener la OVA o la URL para el despliegue, los demás pasos son iguales que los previos para el Cloud.
- Ingresar a la URL del HCX Cloud sin el puerto (anteriormente se había usado el 9443) pero ahora ingresar con las credenciales del SSO.
En la parte del menú de la izquierda seleccionar Administration > System Updates y luego en botón “REQUEST DOWNLOAD LINK” (esto puede tardar algunos segundos, ya que el cursor aparece como prohibido) sea paciente hasta que se habilite. Aparecerá una opción para descargar la OVA o una URL para descargarla, es recomendable la primera opción.

3. En adelante el proceso de despliegue y configuración es el mismo
CONFIGURACION HCX
Una vez los appliance Cloud y Enterprise Manager estén arriba y operando de manera correcta, lo siguiente es hacer la configuración de los sitios.
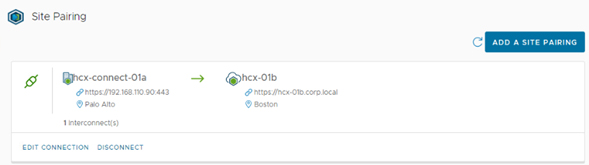
PAIRING
- Ingresar por la URL del HCX Enterprise Manager por el FQDN definido, también puede utilizar el plugin del vCenter

2.Ingresar la información del sitio remoto (HCX Cloud)

3. Aceptar los certificados (validar la conexión)

Los siguientes pasos corresponden a la creación de Network Profile, Compute Profile y finalmente el Service Mesh, elementos que se tomarán de referencia para el despliegue de todo el conjunto de appliances de toda la solución HCX. Para ello, tener en cuenta el orden y dónde se debe realizar la configuración.
NETWORK PROFILE

- Seleccione el vCenter disponible y la red donde estarán los Se recomienda que sea la misma red de gestión donde se encuentra el vCenter.
- Establecer un nombre acorde a la referencia del Nertwork Profile. Por ejemplo, NP-DatacenterX.
- Asignar IPs disponibles para los appliances, estas pueden variar en función de la complejidad y el tamaño de la solución. De igual manera la información necesaria de red como los DNS, DNS suffix, prefix lengh (mask), Gateway.
- Opcional: se puede definir si esta red será utilizada por algún tipo de tráfico, en este caso se marca “management”

5. Finalmente se crea el Network profile

COMPUTE PROFILE
Ahora se procede a crear el perfil de cómputo para los appliances: recursos de CPU, memoria destinada y los servicios que se habilitarán.

- Establecer el nombre

2. Seleccionar los servicios que se desean activar

3. Seleccionar el cluster / los clusters donde se van a desplegar el datastore y el folder

4. Seleccionar el Network Profile creado con anterioridad

5. Seleccionar el Network Container para Network Extension. Desde el HCX Enterprise Manager debe seleccionar el/los vDS que contienen las VMs de interés para la migración y en cuanto a HCX Cloud, el segmento Overlay de la Transport Zone creado en NSX-T

6. Valide las reglas a crear y finalice la configuración


MESH
El paso final de la configuración es crear la malla que relaciona tanto el Network Profile como el Compute Profile.

1.Seleccione el origen y destino

2.Seleccione el compute profile origen con el destino que hace match en su diseño. Tenga cuidado si ha creado más de uno.

3.Valide los servicios que va a habilitar

4. Seleccione los Network Profile que ha diseñado en cada sitio

5. Seleccione la red local que será el vDS donde están las VMs de interés a migrar y en el remoto la red Overlay destinada en NSX-T. La cantidad de appliance es importante ya que cada uno de ellos soporta 9 redes. Si necesita más de esas, deberá desplegar otros appliances

6. Si es el caso, establezca límites de ancho de banda, acepte las configuraciones, valide la topología y finalice la configuración.

Con este proceso se lanza el despliegue de los appliances de HCX. (Esto puede tomar un tiempo aproximado de 1 hora)

NETWORK EXTENSION
La extensión de red permite que desde el origen (HCX Enterprise Connector) hacia el destino (HCX Cloud) pueda verse como la misma red local. Esto permite que se puedan realizar labores de migración con replicación y diferentes técnicas, de tal forma que se tenga un bajo impacto (en ocasiones imperceptible).


Como se ha visto hasta el momento, se ha seleccionado la red origen para el destino. Es importante establecer el Gateway que será el match que se utilizará con los segmentos overlay (previamente creados en NSX-T).

Finalmente, la extensión de red está creada.

Próximo post: Migración de VMs usando HCX y características avanzadas.
Autor: Favio Buchely, Senior Consultant

REFERENCIAS
https://docs.vmware.com/en/VMware-HCX/index.html
https://cloud.google.com/vmware-engine/docs/workloads/howto-migrate-vms-using-hcx
https://docs.vmware.com/en/VMware-HCX/index.html
https://labs.hol.vmware.com/HOL/maintenance/
https://www.vmware.com/latam/products/hcx.html
https://hcx.design/2019/12/13/hcx-network-port-diagrams/
COMPARTE ESTE POST
Share on facebook
Share on twitter
Share on linkedin
Share on whatsapp
Share on print
Share on email
![]()
Fundada en 2006, V2S Corporation es una multinacional de Servicios de Infraestructura y Aplicaciones para todos los sectores e industrias.
Somos expertos en soluciones innovadoras de Virtualización como respuesta a los retos actuales de Transformación Digital.
Nuestras soluciones personalizadas y el conocimiento de los distintos sectores son nuestros principales diferenciadores. Llevamos años auditando, diseñando, implementando y gestionando las soluciones de virtualización más avanzadas. Nuestros servicios se enmarcan dentro del profesionalismo, la precisión, la innovación y la calidad.
V2S Corporation opera globalmente desarrollando proyectos en distintos países. Tenemos oficinas y personal en Europa, África y América Latina. Aunque nuestras operaciones están muy extendidas, nuestro enfoque es operar como una empresa multinacional global centrada en la calidad del servicio. La misma metodología y enfoque están presentes allí donde ofrecemos nuestros servicios adaptándonos al mismo tiempo, a los retos locales.
Habla con nuestros expertos

Conozca en 7 pasos como programar una máquina virtual a través de un Network Profile

MANUAL DE CONFIGURACIÓN PARA UNA MÁQUINA IP A TRAVÉS DE UN NETWORK PROFILE
El presente artículo es un manual para programar una máquina virtual en la cual se encuentra paso a paso la configuración necesaria detallada para una correcta realización de la misma.
En palabras más técnicas se podrá customizar el nombre de una maquina virtual desde el Deployment y aprovisionamiento de direccionamiento IP a través de un Network Profile.
A continuación se presenta el primer paso que es darle un nombre a la máquina:
- Lo primero que vamos a hacer es configurar una acción con código Python para renombrar la máquina virtual.
- En la parte de Extensibility creamos «Nueva acción» donde se le debe poner un nombre.
- En nuestro caso se llamara «Rename_VM» y colocaremos el siguiente codigo:
def handler(context, inputs):
vmname = inputs[\’customProperties\’][\’vmname\’]
returnobj = inputs
returnobj[\’resourceNames\’][0] = vmname
return returnobj
- Luego crearemos una suscripción que en nuestro caso se denominará «Rename VM»
- En la parte de Event Topic vamos a elegir la opción de «Computer Allocation»
- En la parte de Action/ workflow vamos a elegir la acción previamente creada: «rename_vm»
La suscripción quedaría de la siguiente manera:

- Ahora se configura el network Profile para el aprovisionamiento del direccionamiento IP.
- Creamos un network profile. Para este caso se denominará «NET-PROFILE-CPP»

- Luego se elige un portgroup que es donde vamos a aprovisionar los servidores. En este caso lo denominaremos: «Vmware MGMT (213)»
- Utilizamos un TAG para el portgroup Vmware MGMT (2143) denominado: « segmento »

- Por último vamos a configurar el rango de direcciones que utilizarán los servidores aprovisionados sobre este blueprint.
- Dentro del network profile ubicamos el port group lo seleccionamos y damos click en Manage Ip Ranges, ponemos un nombre y configuramos el rango del direccionamiento IP que para nuestro caso será: «168.3.50 to 192.168.3.60»

- Ahora se configura nuestro Blueprint para utilizar los recursos que previamente hemos realizado.
- En el editor YAML debemos declarar la variable para la customización del nombre de la máquina virtual, que en nuestro caso la variable se denomina: «vmname» declarada en la linea 3.
- En la linea 22 estamos llamando el tag que hemos puesto al portgroup Vmware MGMT (213) para que nuestro aprovisionamiento sea configurado en esta red.

- Luego de tener nuestro blueprint procedemos a ejecutar el deploy y ponemos un nombre.

- Después se asigna el nombre que llevará la máquina virtual que en nuestro caso la maquina se denominará: «NOMBREIP»

- Para finalizar podemos observar que la máquina fue renombrada con el nombre solicitado en el Adicional a esto, fue asignada de manera automatica una direccion IP del segmento previamente configurado en el network profile junto con el portgroup.

Así hemos concluido con el paso a paso de esta configuración, esperamos que sea de su agrado. Estaremos publicando más contenido de soluciones pronto.
Autor: Ing. Ronald Augusto Pérez Castellano.

Gracias por ver y compartir.
Conozca todos nuestros servicios de gestión de infraestructuras TI

Automate SSL Cert expiration on VMware TKGI
One of the recurring tasks that we must do as administrators of VMware TKGI systems is to verify when the SSL certificates used by TKGI will expired. We certainly don\’t want to find out that a certificate has expired when our client informs us that their applications are not working!
It is advisable to do this verification at least at the beginning of the year and put reminders in our calendars to be able to rotate the SSL certificates before they expire.
Pivotal (acquired by VMware) has a good documentation on how to obtain all certificates with their expiration dates:
https://community.pivotal.io/s/article/How-to-get-expiry-date-of-all-CA-s-certificates-in-PKS-deployment-and-clusters?language=en_US
But we love to automate everything and avoid any human error during these types of tasks. Also not having to repeat tasks that can be instrumented and automated using different tools available.
For this we have created a script that integrates the instructions described by Pivotal but also automates them and generates a report of the certificates.
Let\’s see how it works! First, let\’s see the prerequisites that we must meet so that our Docker container works without problems:
1.The first thing we have to do is clone this repository:
https://github.com/albertollamaso/vmware_pks_cert_exp_automate
2. We need to put the values of our BOSH server in the env.sh file (see example below)
- BOSH_CLIENT=ops_manager
- BOSH_CLIENT_SECRET=ipScR7YcCdtHnc60KfHtjnwHqHh2inHl
- BOSH_CA_CERT=root_ca_certificate
- BOSH_ENVIRONMENT=10.1.12.15
3. Add the content of the BOSH CA Certficate to the file: root_ca_certificate
4. Inside the Dockefile file we have these two variables that can be configured to our liking:
CRITICAL_DAYS = 7 (If certificate is going to expire before this number of days and it is considered as critical)
WARNING_DAYS = 30 (If certificate is going to expire before this number of days and it is considered as a warning)
That\’s it, once we have all this information and we replace it with our BOSH environment (PKS / TKGI) we can create our Docker image and run it with the following commands as an example:
docker build -t pkscerts .
docker run -it pkscerts
Let\’s see it in action in https://asciinema.org/a/oMRQvb3NOyjEk4Nobrkfes3FP
I love automated tasks, and I strongly believe that companies that incorporate automated practices get more done, plain, simple, avoid human errors and misconfigured systems. I hope this post and the developed scripts here can be used in your VMware PKS and TKGI environments. It also serves as a source of inspiration to begin to automate some other tasks that are always repetitive during the TKGI administration process.
Written by Alberto Llamas
COMPARTE ESTE POST
Share on facebook
Share on twitter
Share on linkedin
Share on whatsapp
Share on print
Share on email
![]()
Fundada en 2006, V2S Corporation es una multinacional de Servicios de Infraestructura y Aplicaciones para todos los sectores e industrias.
Somos expertos en soluciones innovadoras de Virtualización como respuesta a los retos actuales de Transformación Digital.
Nuestras soluciones personalizadas y el conocimiento de los distintos sectores son nuestros principales diferenciadores. Llevamos años auditando, diseñando, implementando y gestionando las soluciones de virtualización más avanzadas. Nuestros servicios se enmarcan dentro del profesionalismo, la precisión, la innovación y la calidad.
V2S Corporation opera globalmente desarrollando proyectos en distintos países. Tenemos oficinas y personal en Europa, África y América Latina. Aunque nuestras operaciones están muy extendidas, nuestro enfoque es operar como una empresa multinacional global centrada en la calidad del servicio. La misma metodología y enfoque están presentes allí donde ofrecemos nuestros servicios adaptándonos al mismo tiempo, a los retos locales.